10 Overlooked Places in Your Home That Are Begging for a Fresh Coat of Paint
When you live in the same space for years, you stop noticing the little things—the door trim that’s dulled to a grayish hue, the pantry walls that have quietly collected smudges, the window ledge that lost its shine long ago. I’ve been in enough homes to know this: it’s not always the big, bold walls that make a space feel tired. It’s the small, overlooked areas that quietly drag down the whole room’s freshness.
If you’ve ever thought, “Something feels off, but I can’t tell what,” there’s a good chance the culprit isn’t your décor—it’s your paint. Those hidden corners, trims, and baseboards you never think about? They’re often the first to fade, chip, or collect grime. And repainting them doesn’t just make your home look cleaner; it changes the energy of the space.
I’ve seen homeowners spend thousands repainting entire rooms when all they really needed was to revive a few neglected spots. That’s what this piece is about—helping you notice what others miss. We’ll go through the most overlooked areas to repaint, why they matter more than you think, and how a few brushstrokes in the right places can make your whole home feel new again.
Before we dive in, think about this: which part of your home have you never painted since you moved in? Hold that thought—you’ll likely find it on this list.
So, are you ready to see the ten hidden spots that are quietly begging for a paint refresh?
The Power of Micro-Areas: Why Repainting the Minor Spots Can Make a Major Difference
I’ve lost count of how many homes I’ve walked into where the walls looked fresh, but something still felt… off. You know that feeling — when a space looks clean but somehow tired? Most of the time, it’s not the main wall color. It’s the trim, baseboards, and window sills quietly stealing the spotlight for all the wrong reasons.
These “micro-areas” frame your entire room. The trim around a doorway outlines every surface you see; the baseboards anchor the floor line; the window sills catch the light (and every speck of dust). When these areas fade, the rest of the room automatically looks dull — even if the walls are newly painted.
Here’s why those small details matter more than you might think:
- They define your visual boundaries. Your eyes naturally follow lines — door frames, ceiling edges, window borders. When those are crisp and clean, the whole room feels structured and intentional.
- They collect the most wear. Hands touch door trim constantly, pets brush against baseboards, and sunlight beats down on window sills daily. That constant exposure breaks down paint faster.
- They impact lighting and reflection. A fresh semi-gloss on trim reflects more light, making the room feel brighter and newer without changing a single bulb.
As Martha Stewart pointed out in her home refresh guide, paying attention to these small details is one of the simplest ways to give your home a “polished, just-painted look” — even if you haven’t touched the main walls.
And honestly, once you start noticing these edges and corners, you can’t unsee them. The payoff is immediate: cleaner lines, brighter rooms, and that satisfying feeling that your home finally looks “finished.”
Should I Repaint the Whole Room — or Just the Hidden Spots First?
I’ve been asked this question more times than I can count. Here’s my honest answer: start small, think strategic. You don’t always need to repaint an entire room to make it look brand new. Sometimes, a 30-minute check-up reveals where the real work is hiding.
Quick Inspection Walk-Through (30 Minutes)
Grab a notepad, turn on every light, and walk through your home with fresh eyes. Here’s what to check:
- Door frames and trim: Run your hand along the edges — any roughness, chips, or gray streaks?
- Baseboards: Kneel down and look at them from the floor’s angle; dirt and scuffs are easier to see.
- Window sills: Check for fading or cracking, especially in sunny rooms.
- Closets and pantries: Open them — you’ll often find yellowed or uneven paint inside.
- Ceiling edges: Step back and look up. Discoloration near the corners? That’s a silent giveaway.
Mark what looks tired or damaged. You’ll likely notice 3–4 small spots that make the biggest difference.
Impact vs. Cost Matrix
When you’re short on time or budget, focus on the “high-impact, low-cost” zones first.
- High impact, low cost: Door frames, baseboards, window trim, stair risers.
- Medium impact: Closets, pantries, garage walls.
- Low impact, higher cost: Full room repainting or ceiling jobs.
You’ll be surprised how much fresher your home feels when you tackle just a few hidden spots instead of committing to a massive project.
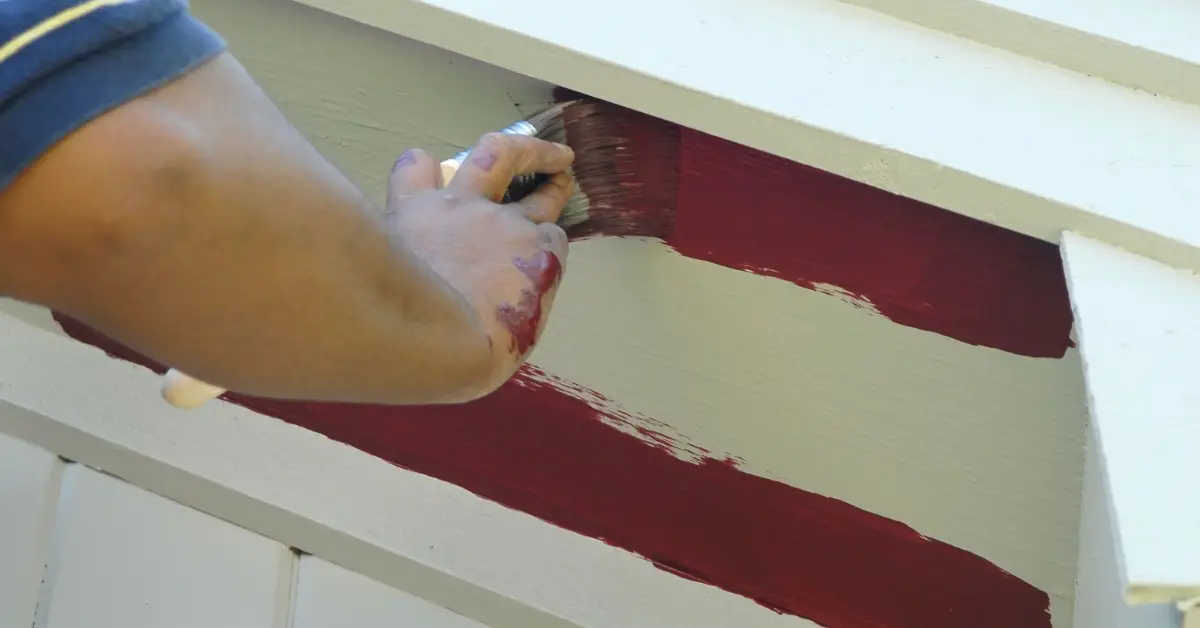
1. Door Frames, Moldings & Trim

If I had to name one area almost every homeowner forgets, this is it. You pass through these frames dozens of times a day, and your hands (and sometimes shoulders) graze them constantly. Over time, they lose their shine, collect fingerprints, and chip at the edges — but because they’re part of your daily background, your eyes tune them out.
Why It Matters
- Door frames define how neat or messy a wall appears.
- Scuffed trim around bright walls instantly dulls the paint job.
- Clean, sharp edges make your wall color pop.
What to Use
- A semi-gloss or satin finish works best — it’s easy to wipe clean and resistant to fingerprints.
- Choose a slightly brighter shade than your wall color for contrast; it helps the frame “lift” the space visually.
Quick Tip / Cost Estimate
- You can repaint an average door frame for under $10 in paint and supplies.
- Wipe down surfaces with a damp cloth first; no sanding is needed unless the paint is peeling.
- Use painter’s tape for clean edges — it’s worth the few extra minutes. And if you want perfectly clean lines without splatters or streaks, check out our guide on 7 Tricks to Prevent Paint Drips and Mess-Free Walls — it’s a quick read packed with pro-level touch-up tips.
As Popular Mechanics noted in their pro painting guide, “small details like trim and molding are what separate a quick job from a professional one.” They were right — I’ve seen homeowners repaint entire rooms when all they needed was a crisp new frame to make the place shine.
So, before you think about rolling another wall, take a closer look at your doorways. They might be quietly begging for a fresh coat.
2. Baseboards and Skirting Boards
You probably don’t notice them until you start cleaning — those slim strips running along your floor. Baseboards take more abuse than any other painted surface in your home. Shoes bump against them, vacuum cleaners scrape them, and dust settles like it’s rent-free. Because they sit low and out of direct sight, you rarely think about their condition — but once you do, you realize how much they affect how clean a room feels.
Why It’s Overlooked
- It’s below your line of sight, so your eyes skip right over it.
- Dirt, pet hair, and scuff marks build up faster here than on walls.
- When baseboards are dull or chipped, even freshly painted walls look unfinished.
How to Prep and Choose Paint
- Start by cleaning. A damp microfiber cloth and a bit of dish soap can remove most grime.
- Use painter’s tape where the baseboard meets the wall and floor for a clean, pro-level edge.
- Choose a durable finish. Semi-gloss or enamel paint resists scratches and makes future cleaning easier.
A homeowner on Reddit shared before-and-after photos after repainting just their baseboards, and the difference was dramatic — the whole living room looked brighter, even though the wall color stayed the same. Small fix, huge payoff.
So, next time you mop the floors, look down. Those baseboards could be silently dulling your home’s entire look.
3. Window Sills, Frames, and Ledges
If there’s one spot that ages faster than any wall, it’s your window frame. Sunlight, moisture, and dust take turns wearing down the paint until it cracks, yellows, or peels. You might not notice it daily, but faded window trim changes how natural light feels in the room — it absorbs it instead of reflecting it.
Why It Shows Wear
- Sunlight exposure fades color and weakens the paint film.
- Condensation and temperature shifts cause cracking and bubbling. If you ever struggle with stuck windows while repainting, our step-by-step guide on 7 Easy Ways to Unstick a Painted-Over Window Without Damage can help you fix it fast without breaking the frame or glass.
- Dust build-up sticks easily on flat ledges, dulling the shine.
Suggested Finishes
- Moisture-resistant paints (like acrylic latex) hold up well in bright or humid rooms.
- Stick with semi-gloss or satin finishes; they reflect light and make cleaning easier.
- If you live near the coast or in a humid area, consider mildew-resistant paint.
Freshly painted sills and frames bounce more light back into the room, instantly brightening it without a single new lamp. Think of it as a “light refresh” for your entire space — subtle, yet instantly noticeable.
4. Interiors of Closets, Pantries, and Cabinetry
Here’s a spot nearly everyone forgets — the inside of closets and pantries. You might open them dozens of times a week, yet rarely think about how they look. But the next time you grab your jacket or cereal box, notice the walls inside. Are they dingy, yellowed, or unevenly painted? A quick coat here doesn’t just make the space look clean; it makes it feel organized and intentional.
Why It’s Hidden but Impactful
- You don’t stare at it daily, but cluttered or dirty closet interiors make the space feel neglected.
- When buyers peek into closets, they instantly sense how well a home is maintained.
- Clean interiors help reflect light, making even small closets feel bigger.
Benefits
- Bright, uniform paint gives your storage spaces a sense of order.
- Light shades make it easier to see items and keep things organized.
- A freshly painted pantry can subtly impress guests or potential buyers.
Color and Finish Tips
- Stick to light neutrals (like soft white or warm beige) for brightness.
- Use washable satin or eggshell paint — it resists marks from boxes and hangers.
- Avoid dark colors unless your closet has strong lighting.
A clean, bright closet interior might not wow anyone on Instagram, but you’ll feel the difference every morning when you reach for your clothes.
5. The “Behind Furniture” Zone: Walls and Trims You Never See
Let’s be honest — how often do you move your sofa or dresser? If your answer is “only when I’m vacuuming for guests,” you’re not alone. The areas behind big furniture are classic paint blind spots. Over time, these hidden zones collect dust, fade unevenly, or show sharp contrast where sunlight never reached.
Why You Should Examine It
- Dust, humidity, and wall friction from furniture legs can discolor or scratch the paint.
- When you eventually rearrange a room, those unpainted patches stand out like a sore thumb.
- Repainting them now ensures color consistency if you decide to redecorate later.
Tactical Tip
- Move one large piece of furniture each weekend — a sofa, bed, or bookshelf.
- Wipe the wall and trim behind it, then spot-repaint or roll a fresh coat as needed.
- Use a small brush for corners; a mini roller works great for wider patches.
As I often tell clients, a “complete paint job” doesn’t mean every inch has to be visible — it means nothing looks neglected. The next time you deep-clean or rearrange furniture, take a few extra minutes to give those forgotten walls the same attention as the rest of your home.
6. Radiator Covers, HVAC Vents, Grilles, and Metal Trims
It’s funny how the most functional things in our homes are often the most ignored. Radiator covers, heating vents, and air return grilles quietly collect dust, heat stains, and fingerprints — yet they sit right in your line of sight. These areas might not feel “decorative,” but when they’re chipped or rusted, they instantly age a space.
Why It’s Overlooked
- Most people see vents as purely functional, not aesthetic.
- Metal surfaces attract dust and discolor from heat or airflow.
- Paint often dulls or flakes because standard wall paints can’t handle heat exposure.
As Martha Stewart pointed out, radiator covers are one of those details that “can make a polished home feel suddenly tired if left unpainted.” And she’s right — freshening these areas subtly lifts an entire room’s finish.
How to Choose Paint
- Use high-heat paint for radiators and metal trims; it prevents yellowing and peeling.
- For vents and grilles, a matte or satin finish keeps them clean-looking without glare.
- Always remove or mask them before painting; it makes the job cleaner and faster.
Maintenance Benefit
- Freshly painted vents trap less dust.
- A uniform color helps these fixtures blend seamlessly into your décor.
- Clean surfaces make routine dusting more effective and less frequent.
A few minutes with the right paint here can make your entire heating setup look professionally maintained — not just “functional.”
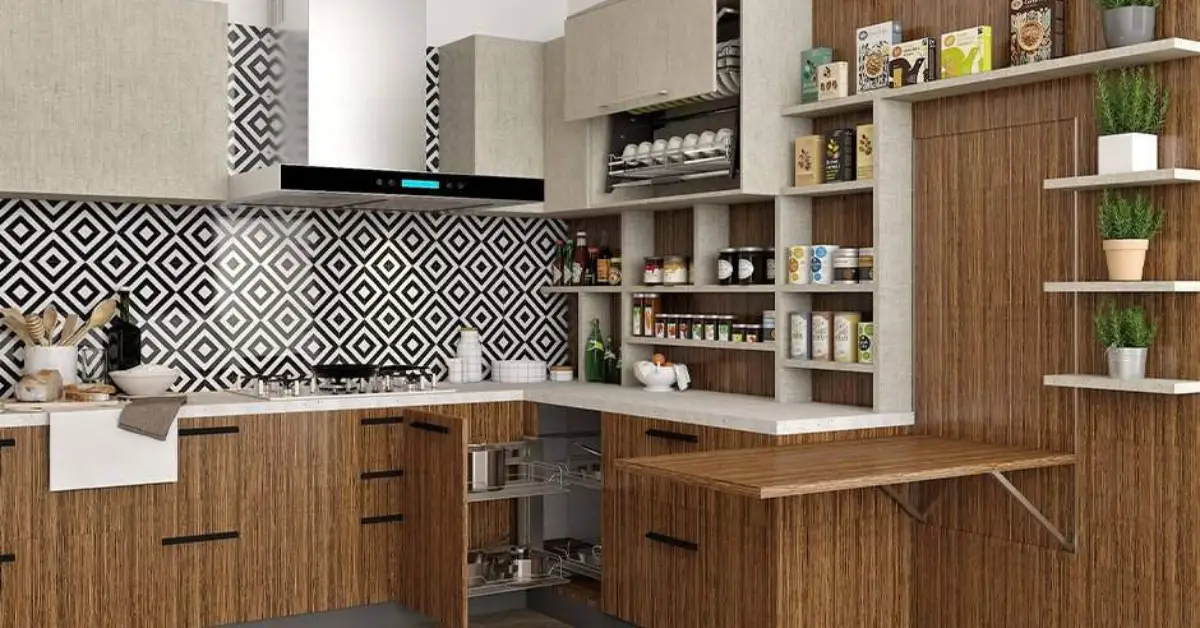
7. Cabinet Door Edges and Interiors in Kitchens/Baths
If you’ve ever opened your kitchen cabinet and thought, “This looks a bit grim,” you’re not alone. The interiors and edges of cupboards often yellow, chip, or show fingerprints long before the exteriors do. Because we mostly focus on what’s visible from the outside, these areas quietly collect years of wear.
Why It’s Missed
- Most repainting projects stop at outer cabinet doors.
- Inside surfaces are constantly exposed to moisture, oils, and steam.
- The edges get touched hundreds of times a week but rarely get repainted.
Benefit
- Clean, bright interiors instantly make kitchens and bathrooms feel fresher.
- When you sell your home, neat cabinet interiors signal careful upkeep.
- Even for yourself, it’s oddly satisfying to open a door and see crisp, clean paint.
Finish & Color Guidance
- Use wipe-clean satin or semi-gloss paint for durability.
- Stick to light tones — white, cream, or pale gray — to reflect light and make storage look organized.
- Let the paint cure fully before rehanging doors or restocking shelves.
This small update can make your morning routine feel a little more polished, and your cabinets will thank you every time you open them.
8. Staircase Micro-Areas: Risers, Handrails, Underside of Stairs
Stairs are the perfect example of an area that endures heavy use but receives minimal attention. You walk up and down every day, yet probably can’t remember when those risers or railings last saw a paintbrush. The result? Dull, scuffed steps that drag down the look of your hallway.
Why Often Ignored
- They’re harder to reach and paint evenly.
- Scuffs and scratches blend in gradually until you no longer notice them.
- Many homeowners assume stairs only need cleaning, not repainting.
Visual Payoff
- Freshly painted risers instantly lift the tone of your entryway.
- Glossed handrails add depth and light reflection.
- Even a subtle color contrast — like white risers and wood treads — can make your staircase a centerpiece.
Safety & Durability Tip
- Use tough, high-traffic paint (floor or porch-grade formulas work best).
- Add a grip additive if you paint the stair treads to prevent slipping.
- For handrails, satin or gloss finishes resist oils from frequent touching.
A small weekend project here gives your home a visual boost that guests will notice before they even reach the living room.
9. Inside the Garage: Service Door, Interior Wall Near Tools, Overhead Storage Walls
Most homeowners treat their garage as a utility zone, not part of the home. But a clean, bright garage interior sets the tone the moment you arrive or leave. Paint it right, and suddenly it feels less like a storage cave and more like an extension of your living space.
Why It Matters
- The garage is often the last untouched area during home upgrades.
- Fresh paint helps define zones for tools, storage, and parking.
- Clean walls make it easier to spot leaks, pests, or damage early.
Functional Benefit
- Paint seals porous walls, reducing dust and grime build-up.
- Scrub-resistant surfaces simplify cleaning and improve air quality.
- It just feels better to step into a tidy, maintained space every day.
Paint Type Guidance
- Use semi-gloss or enamel paint for durability and easy cleaning.
- If you have concrete walls, apply a masonry primer first for adhesion.
- Go for a neutral gray or off-white to maximize brightness.
Your garage might not be your favorite room, but when it’s freshly painted, it quietly raises your entire home’s standard.
10. Ceiling Edges, Soffits, Supply-Return Register Surrounds
Finally, the most ignored area of all — the upper edges where ceilings meet walls. You rarely look up, but faded ceiling lines and dusty air registers dull even the most beautiful paint job.
Why Often Overlooked
- Your eyes naturally focus lower — walls, floors, furniture — not the upper perimeter.
- Paint overlap or yellowing near edges goes unnoticed until you change lighting.
- Registers and soffits collect dust, which dulls surrounding paint.
Benefit
- Clean, defined ceiling edges sharpen the entire room’s finish.
- A subtle refresh here makes your wall color look newer and more intentional.
- Properly maintained edges prevent cracking or uneven paint over time.
Prep Tip
- Use a bright work light or portable lamp to inspect these zones.
- Wipe the edges with a damp cloth before touching up paint.
- If you’re painting near vents, remove the cover first and clean it separately.
Even though most guests won’t consciously notice your ceiling edges, they’ll feel the difference — the room will look sharper, taller, and more thoughtfully finished.
Bonus: Your Fast-Track Repaint Checklist
If you’ve made it this far, you’re already ahead of most homeowners who only think about paint when it starts to peel. But to make sure you actually act on this — here’s a practical, time-saving checklist you can print or bookmark before your next free weekend.
Checklist: The 10 Overlooked Spots to Repaint
- Door frames, moldings & trim — inspect every 6 months
- Baseboards & skirting boards — inspect annually
- Window sills & frames — inspect annually, touch up after rainy seasons
- Closet, pantry & cabinet interiors — inspect every 18–24 months
- Behind large furniture — inspect when rearranging or deep-cleaning
- Radiator covers & HVAC vents — clean and repaint annually
- Cabinet edges & interiors (kitchen/bath) — inspect annually
- Stair risers & handrails — inspect every 6–12 months
- Garage walls & service doors — repaint every 2 years
- Ceiling edges & soffits — inspect annually for discoloration or cracks
Ready, Set, Repaint: Your Home’s Hidden Makeover Starts Now
Here’s the truth — repainting hidden spots isn’t just about appearance. It’s maintenance, it’s hygiene, and it’s the quiet foundation of a well-kept home. When you take care of these overlooked areas, you’re not only protecting surfaces from wear and dust — you’re protecting your investment, your comfort, and your peace of mind.
You don’t need a full weekend or a massive budget. Just pick one or two areas from the checklist above — maybe your baseboards or window sills — and start there. And if an accident happens mid-project, don’t worry — here’s how to handle it quickly with our guide on Spilled Paint? 7 Simple Hacks to Clean Your Carpet, Floors, and Rugs Fast. Once you see the difference, you’ll be hooked.
So, what’s your first target? Tell me in the comments which hidden spot you’re tackling next — or share your before-and-after photos. Your story might inspire someone else to finally grab that paintbrush.
And if you found this guide helpful, visit Build Like New for more practical, expert-backed home maintenance ideas and step-by-step refresh plans that actually make a difference.
Your home’s next big transformation isn’t in the walls — it’s hiding in the details. Go find it.
Disclaimer: This article is for general informational purposes only. Always follow manufacturer instructions for paint products and safety equipment. If you’re unsure about materials, ventilation, or repair needs, consult a licensed painting or home maintenance professional before starting.