
10 Smart Ways to Brighten Up Your Garage Like a Pro
I’ve worked on enough garages over the years to know one simple truth — bad lighting can make even the cleanest, most organized space look dull and cramped. Most folks don’t realize it until they swap those tired fluorescent tubes for brighter, better-placed LEDs. Suddenly, the garage feels bigger, safer, and actually usable.
If you spend time tinkering with tools, detailing your car, or even just storing gear, lighting isn’t just about visibility — it’s about how the space works for you. The right setup can turn your garage from a dim catch-all into a place you actually want to be in.
I’ve seen homeowners waste money on random “bright” lights that leave shadows everywhere or burn out too soon. That’s why I’ve put together this guide — to help you choose lighting ideas that really make sense for your space, not just what looks good on a product box. You’ll find practical, tried-and-tested ideas here — things that actually solve the problems I see in real garages every week.
By the end, you’ll know exactly which upgrades give you the biggest difference for your time and money — whether you’re doing a full revamp or just want to make your garage feel brighter tomorrow.
So, tell me — when you walk into your garage right now, does it feel like a place built for work and creativity, or just another dark corner of the house waiting for a fix?
Why Smart Garage Lighting Matters (Beyond “Just Light”)
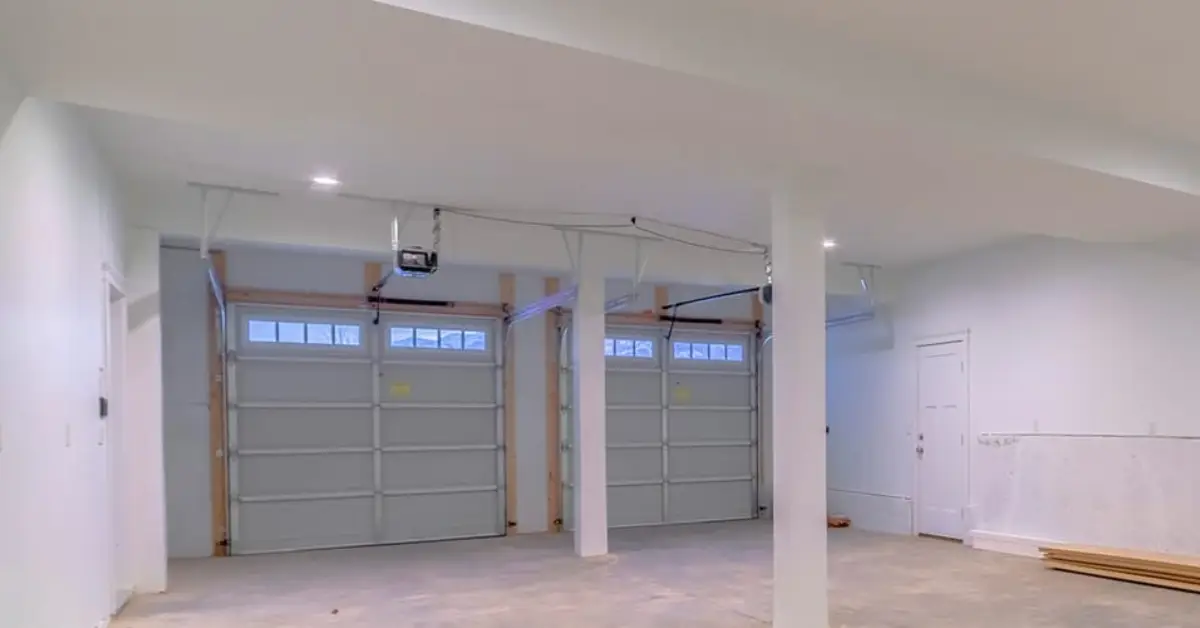
I’ve seen too many garages that feel more like storage caves than usable spaces. You walk in, flick on that single flickering tube light, and still can’t see half of what’s in front of you. Good lighting isn’t just about brightness — it’s about safety, function, and how you feel in your own space.
From Dark, Unsafe Space → Bright, Usable Zone
Let’s start with the basics: visibility. When your lighting is uneven or dim, every corner becomes a hazard. I’ve seen people trip over extension cords, misplace tools, or even scratch their cars just because they couldn’t see clearly.
When you switch to proper LED lighting, everything changes — literally. You can:
- See details clearly at your workbench without straining your eyes.
- Eliminate shadows that hide obstacles or sharp tools.
- Move safely around vehicles, tools, and stored items.
Better visibility doesn’t just make the garage safer — it makes it usable. Suddenly, that same room can function as a workshop, detailing bay, or hobby corner.
Energy & Cost Benefits of Modern Lighting
Here’s something I remind every homeowner: brighter doesn’t mean costlier anymore. Modern LED fixtures use a fraction of the power old bulbs did. In fact, tests have shown up to 85% energy savings when switching from traditional lighting to efficient LEDs. That’s money staying in your pocket every month — and fewer ladder climbs to change burnt-out bulbs.
Besides the energy efficiency, LEDs also:
- Last 10 to 20 times longer than old halogen or fluorescent lights.
- Generate less heat, which matters in a closed garage.
- Turn on instantly — no buzzing, no warm-up delays.
If you’ve been putting off a lighting upgrade because of budget worries, think of LEDs as an investment that pays for itself faster than most home upgrades.
Setting the Mood: Make Your Garage Appealing
You and I both know the garage doesn’t have to look industrial and cold. With a few smart lighting choices, it can actually feel inviting. Whether you want to show off your car, create a clean DIY station, or even film your next project, lighting sets the tone.
Think about layering your light — one set for overall brightness, another to highlight tools or artwork, and maybe a subtle strip light to make the space feel more polished. Once you do, that garage won’t just be a “utility area.” It’ll be part of your home that feels designed — and genuinely enjoyable to use.
How to Plan Your Garage Lighting (Before Picking Fixtures)
I’ve seen people buy the brightest lights they can find online, install them, and still end up unhappy. Why? Because planning matters more than wattage. Before you order a single fixture, take ten minutes to plan your setup — it saves you money, time, and regret later.
Map Out Zones & Tasks (Parking / Workshop / Storage)
Every garage has different zones, and each one needs its own type of light. Grab a notepad, walk into your garage, and identify what happens where:
- Parking area – needs wide, glare-free illumination.
- Workbench or DIY zone – requires task lights that focus directly on your workspace.
- Storage shelves – benefit from softer, directional lighting to reduce shadows.
- Door entry or laundry corner – often overlooked, but deserve clear light for safety.
This zoning approach ensures you’re lighting purposefully — not just evenly. While planning your zones, it’s also smart to think about what not to keep inside your garage. Certain materials and items can create safety or fire hazards under bright lights or changing temperatures — check out 9 Things You Should Never Store in Your Garage to make sure your setup stays both efficient and safe.
Determine Required Brightness, Color Temperature & Layers
Here’s a simple rule I use on every project:
- For general lighting, aim for around 50 lumens per square foot.
- For task areas (like your workbench), go higher — up to 300 lumens per square foot.
The right color temperature also makes a difference. Go for 4000–5000K (neutral white) if you want daylight-like brightness. It helps you see colors accurately and reduces eye strain when working on detailed projects.
And remember: lighting layers make everything better. Combine overhead lights, task lamps, and ambient accents to get full coverage without glare.
Choose the Right Fixture Type and Protection Ratings
Garages are rough environments — dust, humidity, and occasional spills are common. That’s why I always check the IP rating before recommending a fixture.
- IP65 or higher = perfect for dusty or slightly damp spaces.
- IK-rated lights = resistant to impact (handy near tools or vehicles).
You don’t need to overspend — just make sure your fixtures can handle the environment they’re in.
Wiring, Controls & Smart Integration
This is where modern garages really shine. Motion sensors and smart controls make life easier — no more fumbling for a switch when your hands are full of tools. I’ve used systems that automatically turn lights on when you enter and dim them when you leave. It’s efficient, convenient, and surprisingly affordable.
If you want to future-proof your space, check out resources like PacLights — they cover upcoming trends in automation and smart garage lighting.
Here’s what to consider:
- Motion or occupancy sensors – perfect for quick entries.
- Smart Wi-Fi switches – control lighting with your phone or voice.
- Zoned control systems – separate switches for workbench, car bay, and ambient lighting.
When you plan this early, you’ll have a garage that doesn’t just look upgraded — it feels smarter every day you use it.
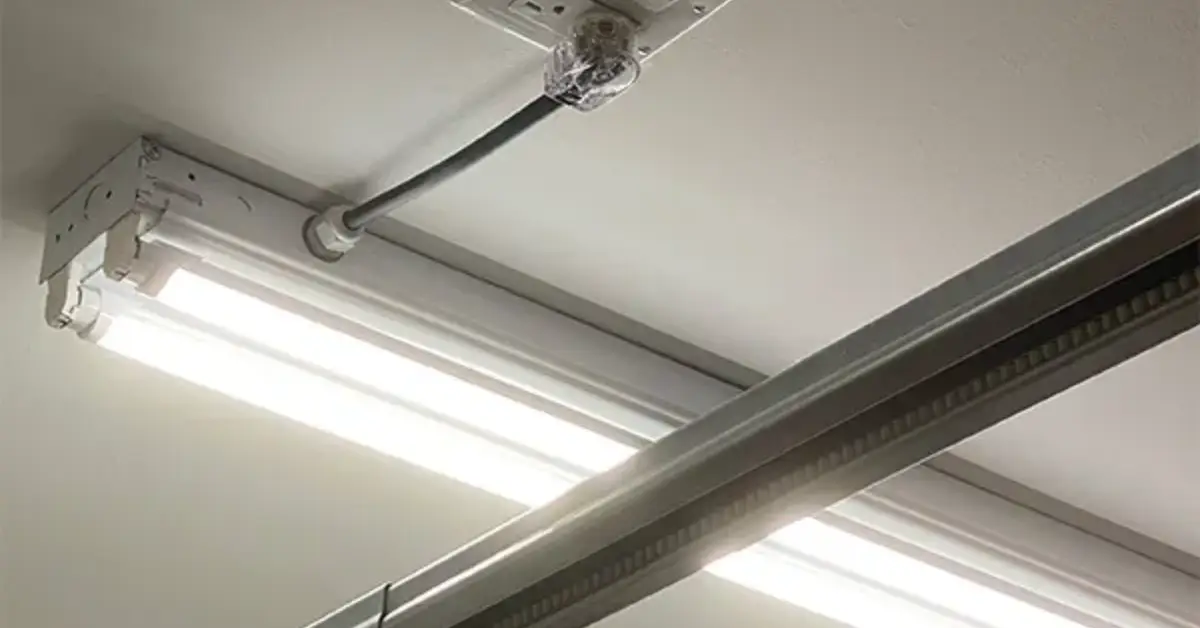
Idea 1 – Bright Ceiling-Mounted LED Panel or Shop Light
I’ve upgraded dozens of garages over the years, and if there’s one change that instantly transforms the space, it’s switching out old fluorescent fixtures for bright, energy-efficient LED panels or shop lights. The difference is night and day—literally.
Why LED Panels or Workshop Lights Are Ideal
You can’t go wrong with a good LED setup. These lights are:
- Energy efficient – they use far less power than old fluorescents or halogens.
- Instant-on – no humming or warm-up delay, just full brightness the second you flip the switch.
- Long-lasting – you’ll get years of reliable light without worrying about replacements.
- Low heat – ideal for enclosed garages that already get warm in summer.
LED panels also distribute light evenly, which means fewer shadows around cars, tools, and walls. That’s especially helpful when you’re detailing a vehicle or organizing small parts.
Placement Tips & Lumens Guidance
Getting the placement right makes all the difference. Here’s what I’ve learned through trial and error:
- Mount panels directly above the main work zones – usually centered over where you park or work.
- Aim for 50 lumens per square foot for general lighting.
- Keep the lights around 8–10 feet apart to avoid dark gaps.
- If you have a low ceiling, use flush-mount LED panels to maximize headroom and coverage.
Even, shadow-free lighting is the key—your garage should feel bright but not blinding.
Visual + Installation Inspiration
One of my favorite upgrades to show clients is a simple before-and-after setup: same garage, same camera angle, but with LEDs installed. The change in brightness and clarity sells itself. You can even find great examples in the Comprehensive Guide to LED Garage Lights by Vorlane, which breaks down installation tips and fixture types with visuals that are easy to follow.
If you’re handy, most LED panels are DIY-friendly. Just remember to turn off power at the breaker and follow the mounting instructions closely—especially when connecting to existing wiring.
Idea 2 – Task Lighting Over Workbench and Car-Prep Areas

When you spend hours working on a project or detailing your car, overhead lighting alone won’t cut it. You need targeted task lighting—focused, bright, and shadow-free.
Why Task Lighting Matters (Avoid Shadows, Improve Precision)
I can’t count how many times I’ve seen people squinting over their tools because the ceiling light doesn’t reach the bench properly. Task lights fix that problem instantly. They:
- Eliminate shadows that hide fine details.
- Make sanding, wiring, or polishing safer and more accurate.
- Reduce eye strain during long sessions.
If you love working with your hands, this type of lighting changes everything.
Best Fixture Types (Adjustable Arms, Strip Lighting, Under-Cabinet Lights)
You’ve got options depending on how you use your space:
- Adjustable arm lamps – perfect for precision tasks; you can direct the beam right where you need it.
- LED strip lighting – excellent for under shelves or along the back of your workbench.
- Under-cabinet task lights – ideal for clean, low-profile setups.
I often recommend combining two types for flexibility—like a fixed strip light plus one adjustable lamp for detailed work.
Positioning & Color Temperature (4000–5000K)
Neutral white light (around 4500K) works best for task areas—it mimics daylight and helps you see colors accurately.
- Mount lights 2–3 feet above the work surface.
- Angle them slightly forward to reduce glare.
- Avoid cool blue or warm yellow tones that distort color perception.
You’ll notice how your workspace suddenly feels more professional and efficient—like a proper workshop, not a corner of your garage.
Idea 3 – Motion-Sensor and Smart Lighting Controls
Let’s face it: you’ve probably walked into your garage with your hands full and wished the lights would just turn on automatically. With motion sensors and smart controls, they can—and they’ll even save you energy in the process.
Why Use Motion Sensors or Occupancy Detection in Garages
These are small upgrades with a big payoff:
- Hands-free convenience – great when carrying groceries or tools.
- Safety boost – no more fumbling for switches in the dark.
- Energy savings – lights shut off automatically when you leave.
Motion sensors are especially useful for garages connected to your home or used at odd hours.
Smart Lighting Integration: Voice Control, Scheduling, Zones
Smart systems take it up a notch. Imagine saying, “Turn on garage work lights,” and the bench area lights up instantly. You can also schedule lights to dim after a certain hour or group them into zones—one for parking, one for the workbench, one for accent lighting.
Typical Cost vs Savings & Practical Setup Tips
You don’t need a big budget to get started:
- Motion sensors: $20–$40 each, plug-and-play.
- Smart switches: $30–$60 depending on brand.
- Full automation systems: around $150–$300 if you want app and voice control.
Start small—add sensors to your main entry zone or workshop first. Once you get used to it, you’ll never want to go back to manual switching.
Idea 4 – Accent and Ambient Lighting to Add Style
Most people never think about ambience when it comes to garages. But if you’ve ever walked into a well-lit workshop, you know how different it feels. Accent lighting adds personality and depth—it turns your garage into a place you actually enjoy spending time in.
Why Ambient/Accent Lighting Makes a Difference
Ambient light fills in where task and ceiling lighting stop. It softens the harshness, adds depth, and gives your garage a finished look. Whether you display collectibles or just want a cleaner vibe, this extra layer changes everything.
Examples: LED Strips Under Shelving, Wall-Wash Lights, Colored Accents
Here are easy upgrades that make a big visual impact:
- LED strip lights under shelves or cabinets.
- Wall-wash lights to highlight tools or art.
- Colored accent lighting to set the mood—blue for modern, amber for warm tones.
You can even sync smart accent lights with your music or home system for weekend projects or game days.
How to Balance Ambient with Task Lighting
Too much accent lighting can create glare or uneven brightness. Keep it balanced by:
- Using dimmers to adjust intensity.
- Keeping accent lights indirect or diffused.
- Avoiding color lighting near the workbench—save that for display zones.
Done right, your garage won’t just look functional—it’ll look like an extension of your home.
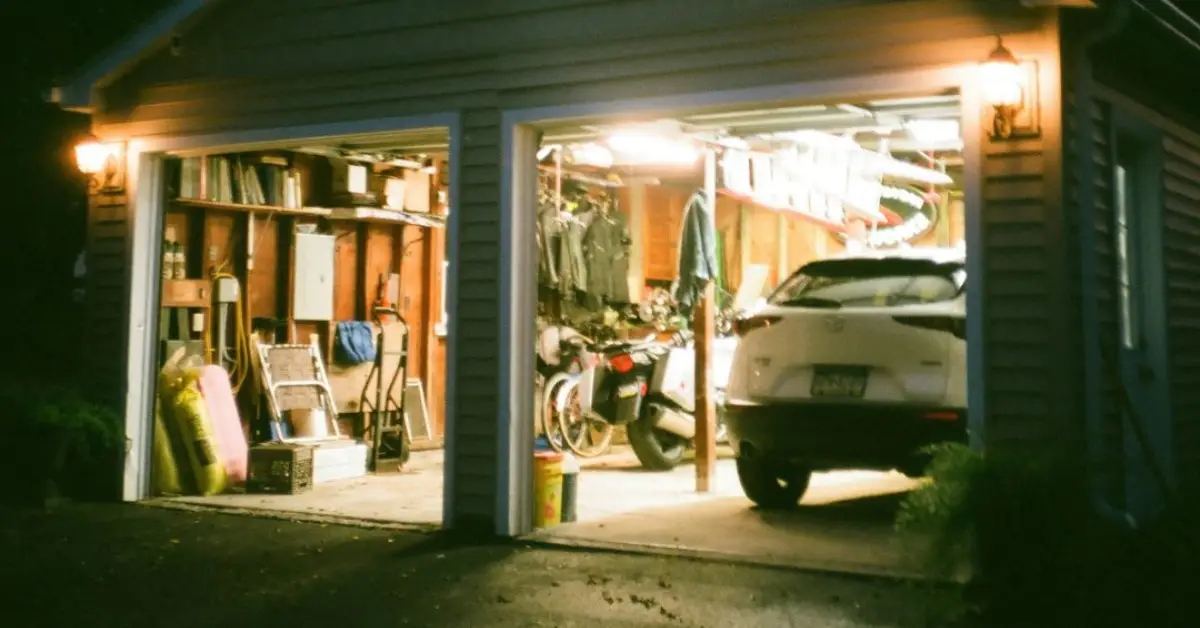
Idea 5 – Flood/Spot Lights for Outdoor Garage Façade & Security
If your garage connects to a driveway or side yard, outdoor lighting isn’t optional—it’s a safety feature. It helps you see clearly at night and makes your home look cared for from the outside.
Why Exterior Lighting Matters (Entry Safety, Curb Appeal)
A well-lit exterior keeps your path visible and deters intruders. Plus, when designed right, it boosts curb appeal—your garage becomes a visual anchor for the entire house.
Best Practices for Fixture Placement & Beam Direction
- Mount floodlights above garage doors at a 45° downward angle.
- Avoid glare toward the street or neighbors’ windows.
- Use wide-beam fixtures for driveways and narrow-beam spots for walls or features.
A combination of both gives you security and style in one go.
PIR Sensors + Dusk-to-Dawn Lights for Security and Energy Efficiency
PIR (Passive Infrared) sensors detect motion and light up only when needed. Dusk-to-dawn lights automatically adjust with daylight, ensuring you never waste power. Together, they create a set-and-forget system that’s efficient and practical. Good lighting is your first line of defense, but security doesn’t stop there. Learn more practical ways to protect your garage from burglars to make sure your upgraded lighting also supports a safer home.
Once you install them, you’ll wonder why you ever put up with dark driveways or manual switches.
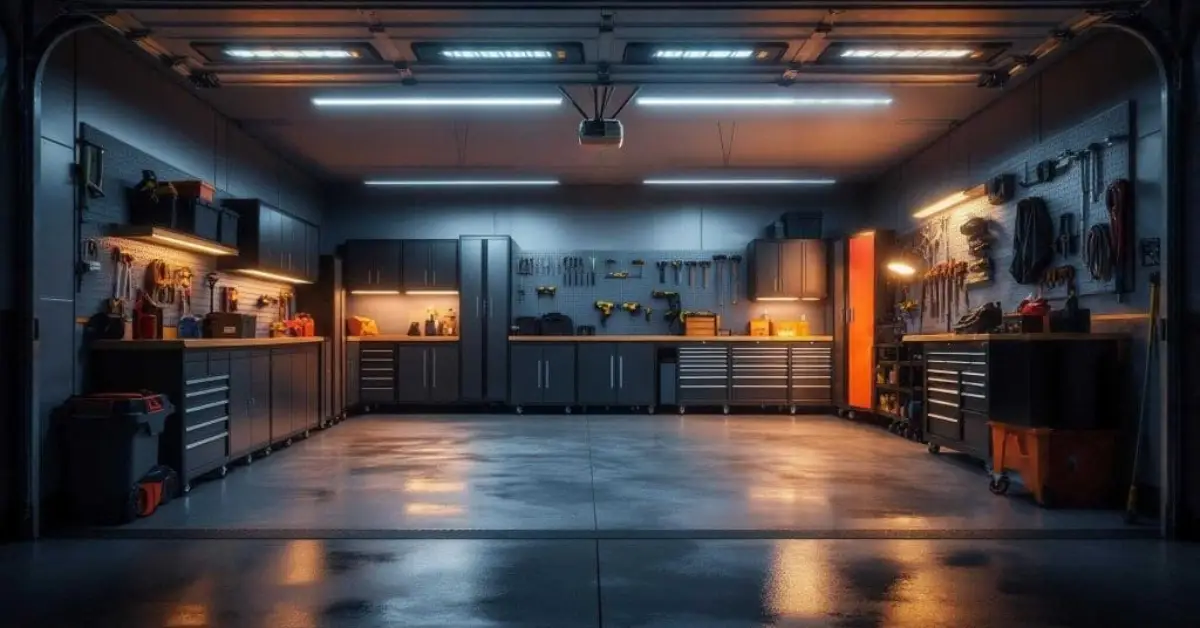
Idea 6 – Layered Lighting Strategy: Combining General + Task + Accent
I’ve seen too many garages lit by a single overhead bulb trying to do everything. The truth is, no one fixture can make a garage fully functional. The real magic happens when you combine layers of light — the same principle used in professional workshops and modern interiors.
What “3-Layer Lighting” Means in a Garage
Think of your garage lighting in three simple layers:
- General lighting – the main overhead illumination (LED panels or shop lights).
- Task lighting – focused lights over your workbench or car prep zone.
- Accent lighting – softer lights that highlight shelves, walls, or displays.
Each layer serves its own purpose — together, they make your space bright, practical, and inviting.
Why Layering Improves Functionality and Aesthetics
Layered lighting solves a problem you might not even realize you have: uneven brightness. With just one central fixture, you’ll get harsh shadows and dull corners. Add task and accent layers, and everything changes.
Here’s how it plays out in real garages:
- In a workshop setup: Use overhead LEDs for overall light, strip lights for your bench, and a warm accent behind shelves to add depth.
- For car detailing: Combine ceiling panels with focused work lamps on either side of the vehicle.
- For storage-heavy spaces: Layer general light with motion-activated strips inside cabinets or shelving.
The balance creates both visibility and comfort — something you’ll feel the first time you walk in.
How to Design Layering in a Small vs. Large Garage
- Small garages: Stick with compact, multipurpose fixtures. For example, mount a bright LED panel in the center and add LED strips under shelves. You’ll get both coverage and character without cluttering the ceiling.
- Large garages: Zone your space. One section for parking, another for tools, maybe one for storage. Each gets its own lighting type and switch control.
The goal is simple — light every area the way you actually use it.
Idea 7 – Optimal Color Temperature & CRI for Garage Lighting
Here’s where the science kicks in — and it’s worth understanding. The color of your light affects how your space feels and how accurately you see what you’re doing.
Understanding Color Temperature (3000K vs. 5000K) in Garage Context
Color temperature (measured in Kelvin, or “K”) changes the tone of your lighting:
- 3000K (warm white): Cozy, soft — great for ambient corners but not ideal for precision work.
- 4000K (neutral white): Balanced, clear light — good for general garage use.
- 5000K (daylight): Bright, crisp, and ideal for task zones or detailing areas.
I’ve found 4000–5000K to be the sweet spot. It mimics daylight without feeling harsh and helps you catch details like scratches, dust, or uneven paint.
Why CRI (Color Rendering Index) Matters for Tasks and Finishing Work
CRI measures how accurately a light source reveals true colors (on a scale of 0–100). A high CRI light (90+) lets you see subtle color differences — critical for car detailing, woodworking, or painting. Poor CRI makes everything look flat and washed out.
Practical Recommendation Chart
| Activity | Recommended CCT | Ideal CRI |
|---|---|---|
| Parking / General Use | 4000K | 80+ |
| Car Detailing / Painting | 5000K | 90+ |
| Workbench / DIY Projects | 4500K | 85–90 |
| Display / Accent Zones | 3000–4000K | 80+ |
The right color and CRI make your garage feel not only brighter but clearer.
Idea 8 – Consider Wiring, Switching & Future-Proofing (EV, Workshop, Storage)
Lighting upgrades aren’t just about bulbs — your wiring and controls need attention too, especially if your garage is evolving into something more than just parking space.
Check Existing Wiring Load, Switch Types, Placement
Before you start adding fixtures, check your electrical capacity. Many older garages share circuits with indoor outlets — not ideal for high-power LEDs or smart systems.
- Upgrade switches if they’re outdated or placed awkwardly.
- Label your circuits clearly before adding new connections.
- Follow local code — safety always comes first.
Since you’re already improving your garage’s electrical system, it’s worth sealing out moisture and drafts too. Try these simple garage door weatherproofing hacks to protect your wiring, fixtures, and tools from humidity and temperature swings.
Plan for Future Uses: EV Charger, Home Gym, Workshop Expansion
If you plan to add an EV charger, gym equipment, or more tools later, account for that now.
- Add extra circuits or conduit during upgrades.
- Use smart switches or hubs that can handle multiple devices.
- Keep outlets accessible in all corners — you’ll thank yourself later.
Future-proofing saves you the headache (and cost) of rewiring down the road.
Tips for DIY vs. Hiring a Professional Electrician
If you’re just swapping fixtures, DIY is fine. But if you’re touching wiring or adding circuits, bring in a licensed electrician. The peace of mind — and code compliance — is worth every penny.
Idea 9 – Maintenance, Lifetime & Sustainability of Lighting Systems
The best garage lighting doesn’t just look good; it lasts. Choosing sustainable, low-maintenance systems saves you time, money, and energy.
Why LED Technology Wins: Lifespan, Reduced Maintenance
LEDs can last up to 50,000 hours — that’s years of use without a bulb change. In comparison, traditional fluorescent lights burn out around 10,000 hours and lose brightness fast. According to Stouch Lighting, switching to LEDs can cut maintenance costs by more than 80% over time.
Cleaning, Dust, and Humid Environment Concerns in Garage
Garages collect dust and humidity fast. Here’s what helps:
- Choose fixtures with sealed housings (IP65+ rated) for moisture resistance.
- Wipe lenses and diffusers quarterly to maintain brightness.
- Check for corrosion if your garage isn’t fully enclosed.
A quick clean every few months keeps your lights performing like new.
Sustainable Lighting Options & Energy-Saving Credentials
Go for Energy Star–certified LEDs or fixtures with recyclable materials. Some brands, like PacLights, design LEDs that reduce carbon footprint and operate efficiently under garage-specific conditions. Smart systems also help — scheduling lights or dimming during daylight hours lowers energy use without you lifting a finger.
Idea 10 – Budget-Friendly Upgrades and DIY Hacks
You don’t need a full renovation to make your garage shine. A few smart, low-cost tweaks can make a big difference.
Affordable Fixture Swaps (Replace Old Tubes, Add LED Strips)
Start small:
- Swap out flickering fluorescent tubes for plug-in LED shop lights.
- Add motion-sensor bulbs near entry doors.
- Install simple LED strips under shelves or cabinets for just a few dollars.
You’ll notice the space instantly feels cleaner and more modern.
DIY Accent Lighting (LED Tape, Repurpose Spot Lights)
If you enjoy weekend projects, try:
- LED tape lights along baseboards or ceiling lines.
- Repurposed spotlights from old lamps to highlight tools or artwork.
- A smart plug to automate on/off control without rewiring.
These small touches bring a professional look without breaking your budget.
When You Should Spend More (Smart Systems, Full Rewiring)
Save your bigger investments for:
- Smart lighting systems that integrate with your phone or voice assistant.
- Full rewiring or circuit upgrades if your garage is older or underpowered.
- Professional-grade fixtures if you use your garage as a workshop or studio.
You don’t have to do everything at once. Upgrade step by step — start with what you’ll feel the most every day.
Quick Check-List & Action Plan for Your Garage Lighting Upgrade
You’ve seen the ideas — now let’s turn them into an action plan. Whether you’re doing this weekend project solo or planning a full upgrade, this checklist keeps you on track and helps avoid costly rework later.
Step 1: Evaluate Current Setup (Existing Lights, Zones)
Start by standing in your garage at night and noting what’s actually working.
- Where are the dark corners or shadow zones?
- How bright are your current fixtures?
- Do any lights flicker or buzz?
Take a few photos — they’ll help you plan placement and show the “before” when you’re done.
Step 2: Note Key Activities & Lighting Needs
What do you actually do in your garage?
- Parking only → Focus on wide coverage lighting.
- DIY or car detailing → You’ll need task lighting and higher CRI fixtures.
- Storage or display space → Consider softer accent lights.
Defining how you use your garage shapes your lighting layers and prevents overbuying.
Step 3: Choose Fixture Types and Specs (Lumens, CCT, CRI)
Now you can match the right fixture to your needs.
- General light: LED panel or shop light (~50 lumens/sq ft).
- Task light: Adjustable arms or strips (4000–5000K, CRI 85+).
- Accent light: Warm white LED strip or spot (~3000–4000K).
Write these down — they’ll be your shopping guide.
Step 4: Select Controls & Smart Options
Adding control systems makes your lighting more convenient and efficient:
- Motion sensors for entry and walkway zones.
- Smart plugs or switches for scheduling and remote control.
- Voice integration (Alexa, Google Home) for hands-free use.
These upgrades don’t just make your garage smarter — they future-proof it.
Step 5: Budgeting + Timeline + Maintenance Schedule
Set your budget by phase:
- Immediate fixes: Replace dead or flickering bulbs.
- Short-term upgrades: Add task or accent lighting.
- Long-term: Plan for wiring or smart integration.
Then, mark your calendar — a quick lens cleaning every three months keeps light output strong.
Wrap-Up and Invitation to Start Your Upgrade
Good lighting doesn’t just make your garage brighter — it changes how you use it. Once you upgrade, you’ll notice you spend more time there, whether you’re fixing something, detailing your car, or simply enjoying a cleaner, safer space.
A well-lit garage feels bigger, more organized, and even adds resale appeal to your home. It’s one of those upgrades that’s both practical and instantly rewarding.
If you’ve tried any of these lighting ideas, I’d love to see how your space turned out. Share your before and after shots or drop a quick comment below — your setup might just inspire someone else.
Ready to make your garage look and feel brand new? Head over to Build Like New for more expert guides, step-by-step makeovers, and practical DIY plans. Let’s make your next garage upgrade one that truly shines — starting today.
Disclaimer: The information in this guide is for general educational and planning purposes only. Always follow local electrical codes and safety regulations when installing or upgrading lighting. If you’re unsure about wiring, load capacity, or fixture compatibility, consult a licensed electrician before making changes.