Why Your Sprinkler System is Costing You More – 7 Signs You Need Repairs
We’ve all been there—watching your lawn turn brown or getting soaked from a malfunctioning sprinkler system when it should be watering the garden. It’s easy to ignore small issues, but if you want a lush, green lawn and a reliable irrigation system, regular maintenance is a must.
Let me be real: Ignoring the signs your sprinkler system needs repair can cost you more in the long run. From increased water bills due to leaks to a garden that looks like it’s struggling to survive, these little problems snowball quickly. The good news? You can prevent them with just a bit of effort.
In this guide, we’ll walk through the 7 most common sprinkler issues and how to fix them. I’ll make sure you understand exactly what’s going on, and how you can tackle the repairs yourself (or know when it’s time to call in the pros). Ready to save your lawn? Let’s dive in!
1. Low Water Pressure – Why It Happens and How to Fix It
We’ve all faced it—one or more sprinklers in your system barely releasing any water, leaving your lawn looking dry. Low water pressure is a common issue in sprinkler systems, but the good news is it’s usually fixable with a bit of troubleshooting. Let’s dive into what might be causing the issue and how you can fix it.
Common Causes of Low Water Pressure:
- Blockages in the System: Over time, dirt, debris, or even algae can clog your sprinkler heads or pipes, reducing water flow. It’s like having a hose with a kink in it — the water just can’t get through properly.
- Leaks in the Pipes: Even the tiniest leak can drastically reduce your water pressure. If the system is leaking underground, you might not even notice until your water bill goes up.
- Malfunctioning Valve: The valve controls how much water flows into your sprinkler system. If it’s broken or clogged, it can lead to insufficient pressure.
How to Fix Low Water Pressure:
- Step 1: Check for blockages
Inspect each sprinkler head and nozzle for debris. You can clean most heads with water and a small brush. If you find any heads that are clogged or damaged, replace them. - Step 2: Look for leaks
Inspect your system for leaks, especially around pipe connections and sprinkler heads. A simple visual check or even a pressure test can reveal hidden leaks. If you find one, repair the pipes or fittings. - Step 3: Inspect the valve
Sometimes, valves get clogged with dirt or rust. Shut off the water and take apart the valve to clean it. If that doesn’t solve the problem, consider replacing the valve.
Fixing low water pressure might take a bit of effort, but it’s worth it to restore your sprinkler system’s full function. Regular checks and cleaning will prevent the issue from recurring. For more creative ways to revamp your garden while ensuring water efficiency, check out our article on 10 Stunning Fall Garden Ideas to Transform Your Home Instantly.
Expert Tips from DripWorks can give you more insights into ensuring your system stays in top condition.
2. Uneven Water Coverage – Causes and Solutions
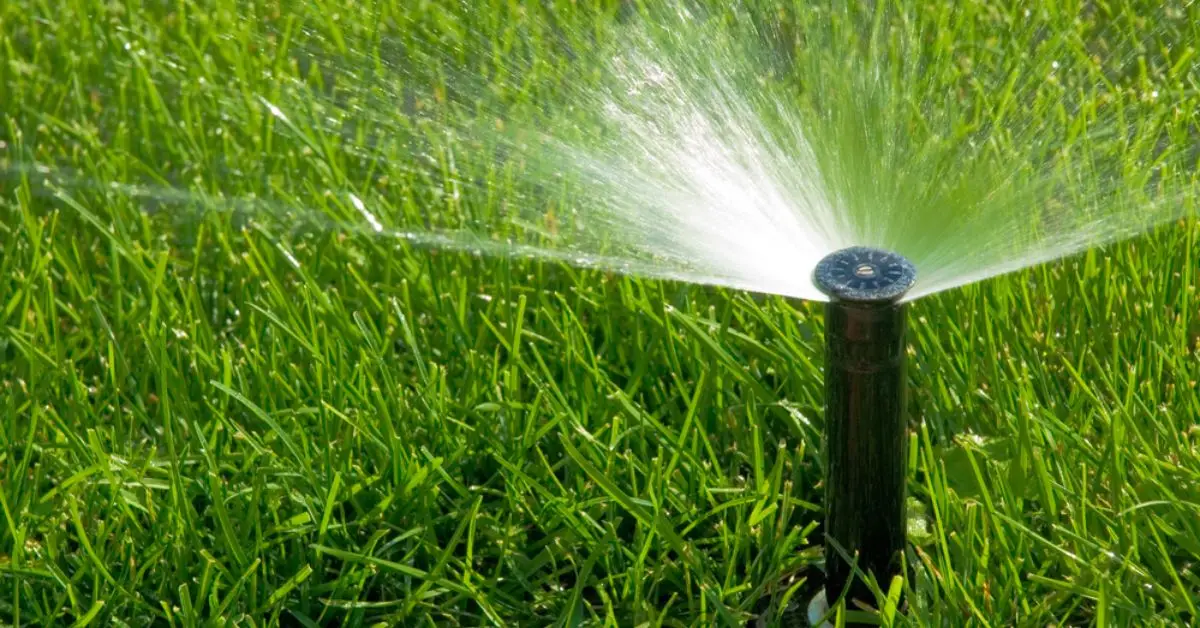
Imagine this: you have some areas of your lawn lush and green, while other spots are barely holding on. Uneven water coverage is one of the most frustrating issues for homeowners, and it can leave your lawn looking patchy. Luckily, it’s usually an easy fix!
Common Causes of Uneven Water Coverage:
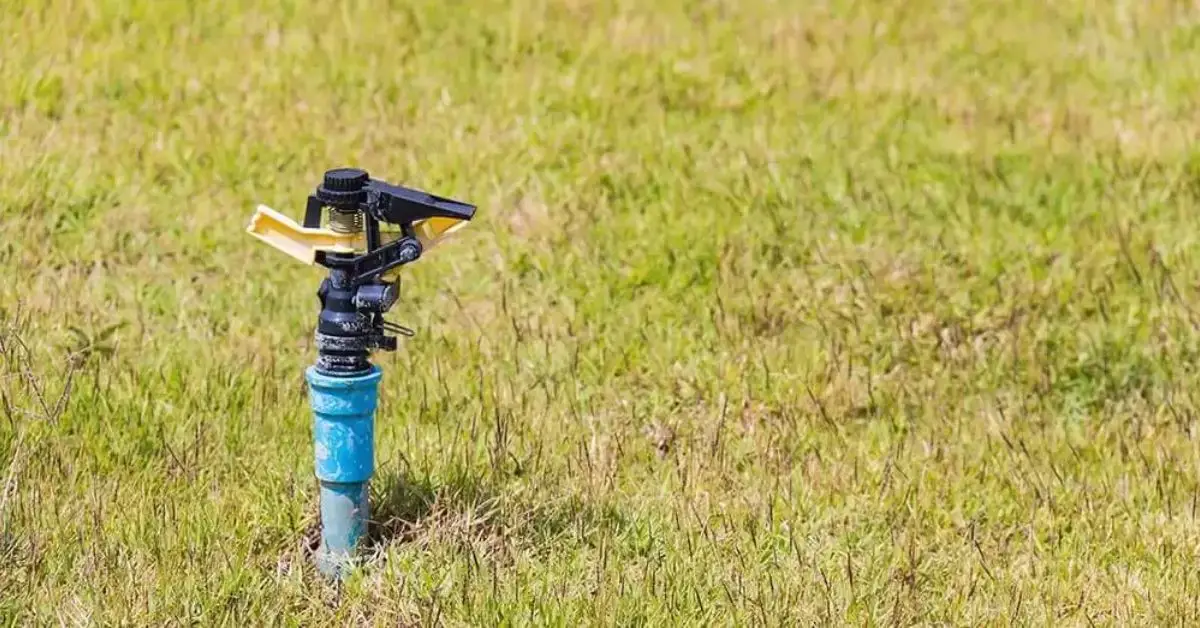
- Misaligned Sprinkler Heads: One of the main reasons for uneven coverage is when sprinkler heads are misaligned or positioned incorrectly. They may be watering areas they shouldn’t, or not watering areas they should.
- Clogs in the Sprinkler Heads: Dirt, minerals, and other debris can clog your sprinkler heads, leading to weak or irregular water distribution. Over time, even a small clog can cause significant water distribution problems.
- Wrong Sprinkler Head Type: If your sprinkler heads don’t match your lawn’s layout or the size of your garden, you could end up with areas that are over-watered or under-watered. For example, a fixed head in a large area won’t give the same coverage as a rotating one.
How to Fix Uneven Water Coverage:
- Step 1: Adjust the heads: Start by checking if the heads are correctly positioned to cover the entire area. Adjust them if needed. You can use a tool to turn the sprinkler heads, ensuring they point in the right direction to cover all your lawn evenly.
- Step 2: Clean the heads: If you notice water is spraying in strange patterns or is weak, clean the sprinkler heads. Soak them in water to dissolve mineral deposits, and scrub away any debris.
- Step 3: Upgrade the heads: If you’re using the wrong type of sprinkler head for your lawn, it might be time to swap them out. Consider switching to rotating or oscillating heads for larger areas or areas with irregular shapes.
The best part? Solving this issue will help conserve water while ensuring your lawn gets the hydration it needs. For a perfectly balanced garden, consider looking at our post on Garden Makeover Ideas to enhance the beauty and functionality of your garden.
3. Sprinkler Heads Not Popping Up
It’s frustrating when you’re trying to water your lawn, and the sprinkler heads just won’t pop up. This problem often leaves you with dry patches on your lawn and an inefficient watering system. But don’t worry—this issue is more common than you think, and it’s usually easy to fix.
Common Causes of Sprinkler Heads Not Popping Up:
- Debris in the Sprinkler Head: Dirt, leaves, and grass can clog the mechanism that allows the sprinkler to pop up. Over time, these blockages can cause the head to stick or fail to rise.
- Damaged Sprinkler Parts: Sprinkler heads are often subject to wear and tear, especially when subjected to heavy foot traffic or lawn equipment. Parts like the spring or seal can become damaged, causing the head to malfunction.
- Low Water Pressure: If there isn’t enough water pressure in the system, the sprinkler head won’t have enough force to pop up. This could be due to a problem in your mainline or an issue with the water supply.
How to Fix Sprinkler Heads That Won’t Pop Up:
- Step 1: Check for blockages
Remove the sprinkler head and inspect it for any dirt or debris. Clean it with a brush or soak it in water if needed. If the head is clogged, a thorough cleaning will usually solve the issue. - Step 2: Examine the parts
Check the sprinkler’s spring, seal, and other moving parts for any visible damage. If any parts are broken or worn out, it’s time to replace them. - Step 3: Adjust the water pressure
If cleaning and replacing parts doesn’t work, check your water pressure. You can test the pressure using a gauge or call a professional if you’re unsure about adjusting it yourself.
Fixing this issue means no more missed areas and a healthier lawn. For more detailed advice on fixing sprinkler heads, you can refer to KND Landscaping here, who specializes in sprinkler maintenance.
4. Sprinkler System Leaks – How to Identify and Repair Them
Leaks in your sprinkler system not only waste water, but they can also cause a significant spike in your water bill. If you’ve noticed puddles in your yard or a sudden drop in pressure, it could be time to hunt down those leaks. Let’s look at how to detect and fix them.
Common Causes of Sprinkler Leaks:
- Cracked Pipes: Over time, pipes can crack due to temperature changes, soil movement, or general wear and tear. These cracks can leak water, causing both pressure loss and wasted resources.
- Loose or Damaged Fittings: The connections between your sprinkler heads and the pipes can loosen over time, leading to leaks. If these fittings are cracked or worn, they will allow water to escape.
- Sprinkler Head Damage: Sometimes, sprinkler heads themselves can crack or break, especially if they’re hit by lawnmowers or other equipment.
How to Fix Sprinkler System Leaks:
- Step 1: Perform a visual inspection
Walk around your lawn and look for any obvious leaks. Look for wet spots, puddles, or soggy areas that might indicate where the leak is located. - Step 2: Use a pressure test
If you can’t see the leak, you can perform a pressure test on your system. This will help you pinpoint the affected area. - Step 3: Repair or replace damaged parts
Once you find the leak, repair the damaged pipe or fitting using appropriate sealants or replace the damaged sprinkler head. If the damage is extensive, you may need to dig up the area and replace the pipe.
5. Sprinkler System Doesn’t Turn On – Troubleshooting Tips
When your sprinkler system refuses to turn on, it’s more than just a minor inconvenience—it can throw off your whole lawn care routine. But before you call for professional help, let’s troubleshoot some common issues that could be causing the problem.
Common Causes for a Sprinkler System Not Turning On:
- Timer Settings or Malfunction: Sometimes, the problem is as simple as the timer not being set correctly. If the timer is malfunctioning, it may not send the signal to start the system.
- Faulty Valve: If the valve that controls the water flow is faulty, the system won’t start, no matter how much you try. The valve could be clogged, broken, or just not receiving the right signal.
- Wiring Issues: Electrical problems like broken wires or poor connections between the timer and the valve can prevent the system from operating.
How to Fix the Sprinkler System Not Turning On:
- Step 1: Check the timer settings
Double-check that the timer is set to the correct time and that the watering schedule is enabled. Sometimes, resetting the timer can resolve the issue. - Step 2: Inspect the valve
Check for any visible damage to the valve. If it looks worn out or clogged, clean it or replace it. If the valve is receiving no power, you might need to fix the wiring. - Step 3: Check the wiring
If there’s no power to the system, the wiring might be the issue. Look for exposed, frayed, or disconnected wires. If you’re not comfortable fixing the wiring yourself, it’s best to call a professional.
6. Clogged Sprinkler Heads – Why It Happens and How to Clean Them
Have you ever noticed that certain areas of your lawn aren’t getting enough water? A clogged sprinkler head could be the culprit. Over time, debris, dirt, and even mineral buildup can restrict water flow, leading to uneven watering and an underperforming system. Let’s walk through how you can clean and maintain your sprinkler heads so that they keep your system running smoothly.
Common Causes of Clogged Sprinkler Heads:
- Dirt and Debris: Leaves, twigs, and even dirt can get lodged inside your sprinkler heads, preventing them from spraying water properly. This is especially common if your sprinkler heads pop up near areas with a lot of fallen leaves or lawn debris.
- Mineral Buildup: If you have hard water, mineral deposits can slowly accumulate inside the sprinkler head, clogging the small nozzles and reducing water flow.
- Insect Nests or Blockages: Small insects or even soil can find their way into sprinkler heads, creating blockages. This is less common but still something to check for if the sprinkler isn’t functioning properly.
How to Clean and Maintain Clogged Sprinkler Heads:
- Step 1: Remove the Sprinkler Head
Start by turning off the water supply. Once the water is off, carefully remove the sprinkler head from its base. You might need pliers to unscrew it, depending on the model. - Step 2: Clean the Nozzles
Once removed, use a small brush or an old toothbrush to scrub away any dirt or mineral buildup from the nozzles. Soaking the sprinkler head in a bowl of vinegar or a water and baking soda solution can help dissolve stubborn mineral deposits. - Step 3: Check for Any Blockages Inside the Head
Inspect the inside of the sprinkler head for debris or clogs. If you find any, carefully remove them with a pin or needle. Rinse the head thoroughly before reinstalling it. - Step 4: Reassemble and Test
After cleaning, reattach the sprinkler head and turn the water back on. Test the sprinkler to ensure it’s popping up and spraying water evenly.
Maintaining clean sprinkler heads will ensure your system runs efficiently and waters your lawn evenly. Want to attract some feathered friends to your garden while you’re at it? Learn more with our guide on Attracting Hummingbirds to Your Home Garden. For a more detailed step-by-step guide on cleaning sprinkler heads, check out Simmons Landscape’s advice here.
7. Timer or Controller Issues – How to Fix Sprinkler Timing Problems

Have you ever left for a vacation, only to return to a lawn that’s either drenched or dried out? Incorrect sprinkler timing could be the cause of overwatering or underwatering your plants. Fortunately, it’s a problem you can fix with a little bit of troubleshooting. Let’s go through the common issues and how you can adjust your timer to get your lawn back on track.
Common Timer Issues:
- Incorrect Settings: Sometimes, it’s as simple as an incorrect watering schedule or time set on your controller. If the timer isn’t programmed correctly, your system may water at the wrong times of day or for too long.
- Battery or Power Issues: If your sprinkler controller is battery-powered, it may not be receiving enough power to function properly. Similarly, power outages can cause your system to lose its schedule.
- Worn Out Timer: Over time, timers can wear out or fail. When this happens, you might find that your system stops working altogether or continues to water even when it shouldn’t.
How to Fix Timer or Controller Issues:
- Step 1: Check the Settings
Review your watering schedule and adjust it based on your lawn’s needs. Ensure that the system is set to water early in the morning or late evening, which is the best time for water absorption. - Step 2: Replace the Battery
If you’re using a battery-powered timer, check the battery level. If the battery is low, replace it to restore functionality. - Step 3: Reset the Timer
If the timer isn’t responding correctly, try resetting it. This will often clear out any faulty settings and restore the system to its default settings. - Step 4: Replace the Timer
If none of the above steps work, it might be time to replace the timer. Look for a timer that offers better features, like a rain delay function or a smart controller that adjusts watering based on the weather.
Conclusion: Prolong the Life of Your Sprinkler System with Regular Checks
Maintaining your sprinkler system may seem like a small task, but trust me, it can save you from bigger headaches down the road. Regular checks and minor repairs can prevent costly replacements, reduce water waste, and keep your lawn looking lush and healthy. Whether it’s cleaning the sprinkler heads, fixing low water pressure, or ensuring your timer is set correctly, a little effort goes a long way in prolonging the life of your system.
Don’t wait for issues to escalate. Taking action now means you won’t have to deal with bigger, more expensive problems later. Keep your system running smoothly by staying on top of maintenance!
Is your sprinkler system in need of a checkup? Don’t wait for problems to arise—schedule a professional maintenance appointment today! Drop a comment below and let us know about your sprinkler challenges, or visit Build Like New for more tips and services to keep your home in top shape!
Disclaimer: Always consult a professional if you’re unsure about repairing your sprinkler system. DIY repairs can sometimes cause more damage if done incorrectly.