
7 Proven Tricks to Remove Tile Grout Without Cracking Your Floor
Every homeowner hits this moment sooner or later — you step into the bathroom, notice dull, cracked grout lines between tiles, and think, “Maybe it’s time to refresh this.” Then comes the hesitation: what if I chip a tile or ruin the finish?
I’ve been there too. Over the years, I’ve seen dozens of people rush into grout removal with a screwdriver or harsh cleaner, only to end up with scratched floors or loose edges. The truth is, removing grout safely isn’t about brute force — it’s about precision, patience, and knowing which method fits your floor.
Most guides online make it sound easy: “just grab a grout saw and scrape it out.” What they don’t tell you is how tile composition, grout type, and even humidity can decide whether your floor stays intact or turns into a repair bill.
In this guide, I’ll walk you through seven proven, low-risk ways to remove old grout without damaging your tiles — from small bathroom corners to full kitchen floors. You’ll also learn how to spot when it’s safer to call a professional, how to reseal tiles afterward, and what mistakes to avoid if you want your floor to last another decade.
Before we dive in, tell me — have you ever tried removing grout yourself? How did it go?
Why Grout Removal Needs Extra Care
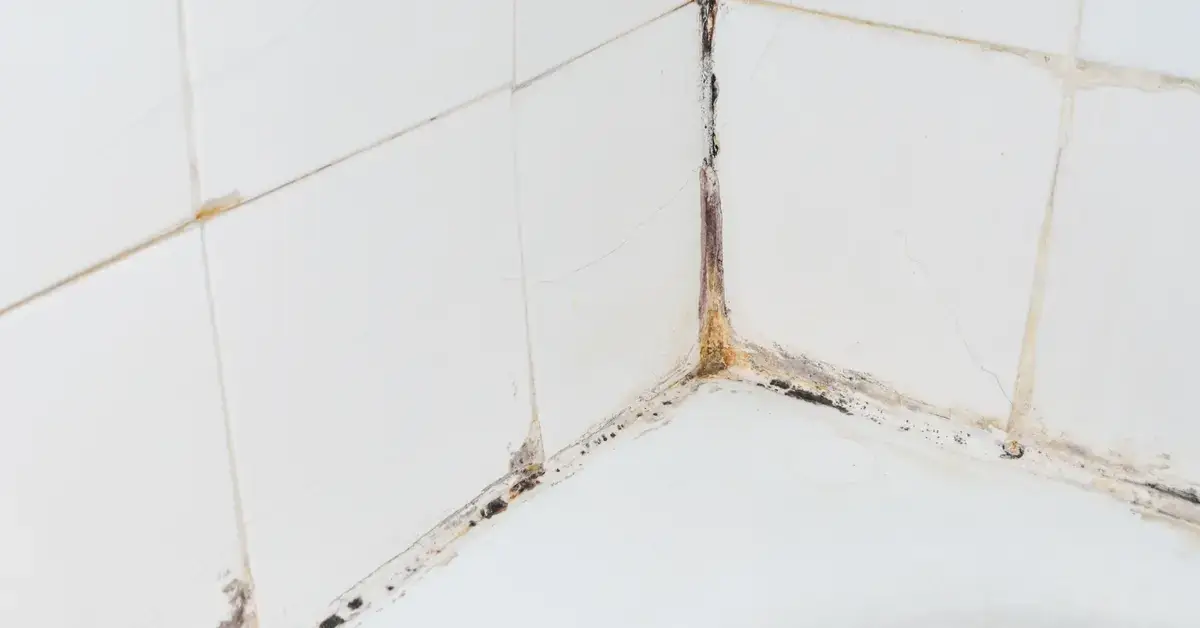
When you’ve lived with tile floors for a while, it’s easy to forget how fragile they can be — until you start removing grout. That narrow line between tiles isn’t just there for looks; it’s the barrier that keeps moisture out and holds your floor together. One slip of a tool, and you could end up with a chipped corner or a hairline crack that spreads over time.
I’ve seen people go in too hard with a screwdriver or power tool, thinking the grout will just crumble away. But here’s the truth: grout bonds tightly to the tile edges, especially if it’s old or has been sealed multiple times. That means every stroke of your tool presses against the tile surface too. If you’re not careful, you’ll scratch the glaze — or worse, loosen the tile completely.
Here are the most common reasons tiles get damaged during grout removal:
- Using sharp metal tools without control — they dig into the glaze easily.
- Skipping edge protection — painter’s tape or guards make a huge difference.
- Removing grout dry — friction builds heat and micro-cracks start forming.
- Forgetting sealant — old sealant can cause uneven resistance and chipping.
Removing grout safely is all about balance. You want to loosen the bond, not force it out. Think of it like dental cleaning — slow, precise, and deliberate. A good rule? If the dust starts flying, you’re pressing too hard.
So before you grab any tool, pause. Prep your floor, set your pace, and treat it like a restoration project, not demolition. That mindset alone can save your tiles.
1. Identify Your Grout Type Before Starting
Here’s something most guides skip — not all grout is the same. If you’ve ever wondered why one bathroom’s grout scrapes off easily while another feels like concrete, it’s because grout type decides your method.
Let’s break it down simply:
- Cement-Based Grout: Most common in homes. It softens slightly with moisture and is easiest to remove using a grout saw or rake.
- Epoxy Grout: Nearly waterproof and very durable. It’s tough to remove and often needs a rotary tool or mild chemical softener.
- Urethane Grout: Flexible and stain-resistant, common in newer homes. Easier than epoxy, but still requires patience and a steady hand.
Not sure which one you’ve got? Try this quick test:
- Dab a small area with warm water. If it darkens or softens, it’s likely cement-based.
- If it stays hard and glossy, you’re dealing with epoxy or urethane.
- Gently scrape with a screwdriver. Powder = cement, rubbery = urethane.
Once you know your type, you can plan your tools and timing. For example, epoxy removal with a manual tool is a waste of energy — you’ll need a bit with higher torque. Cement-based grout, on the other hand, responds well to hand tools if you take your time.
For a clear, step-by-step breakdown of different methods, The Spruce’s guide explains how moisture, pressure, and tool choice affect grout safety. It’s worth checking once before you start.
Remember, identifying your grout isn’t a technical step — it’s insurance. You’ll avoid cracked tiles, wasted effort, and that sinking feeling of realizing you used the wrong method halfway through.
2. Safety Prep — Gear, Ventilation, and Tile Protection
Before you even touch a grout line, set yourself up for safety. Removing grout may seem simple, but it creates fine dust that can irritate your eyes and lungs — and one slip can scratch the tile surface you’re trying to protect. I’ve seen people skip this part to “save time,” only to spend twice as long cleaning up or fixing preventable damage.
Start by gathering a few essentials:
- Safety goggles: Tiny bits of grout can chip off unexpectedly. Even a soft scrape can send small particles flying.
- Dust mask or respirator: You’ll be stirring up fine cement dust that lingers in the air. A basic mask works for small areas, but a respirator is better if you’re tackling a big section.
- Gloves: They protect against tool slips and chemical softeners, especially when using acid-based removers.
Once you’re geared up, protect your tile edges. I like to run painter’s tape along both sides of the grout line — it acts like a bumper for your tools. If you’re working on delicate or glossy tiles, lay strips of thin cardboard nearby to absorb stray scratches.
If you plan to use any kind of chemical grout remover, ventilation is critical. Keep a window open or use a fan to push air out of the room. Even mild dissolvers release fumes that can build up quickly in bathrooms or kitchens.
If you’re working in a closed bathroom and notice poor air circulation or weak water flow, try these 10 DIY tricks to boost weak shower flow before your next grout or bathroom maintenance project — it makes the whole process cleaner and more comfortable.
Here’s a quick prep checklist before you start:
- Tape tile edges securely
- Put on goggles, gloves, and a mask
- Set up a fan or open windows for airflow
- Keep a damp cloth ready to catch dust immediately
Skipping prep may feel faster, but it’s almost always what causes scratches, dust buildup, and those little “oops” moments you’ll regret later. A few minutes of setup makes the rest of the job smoother — and a lot safer.
3. Manual Grout Removal Methods (Best for Small Jobs)
If you’re only tackling a small patch — maybe a cracked corner in the shower or a discolored line near the sink — manual methods are your best friend. They’re quiet, controlled, and far less likely to damage tile edges.
Using a Grout Saw or Grout Rake
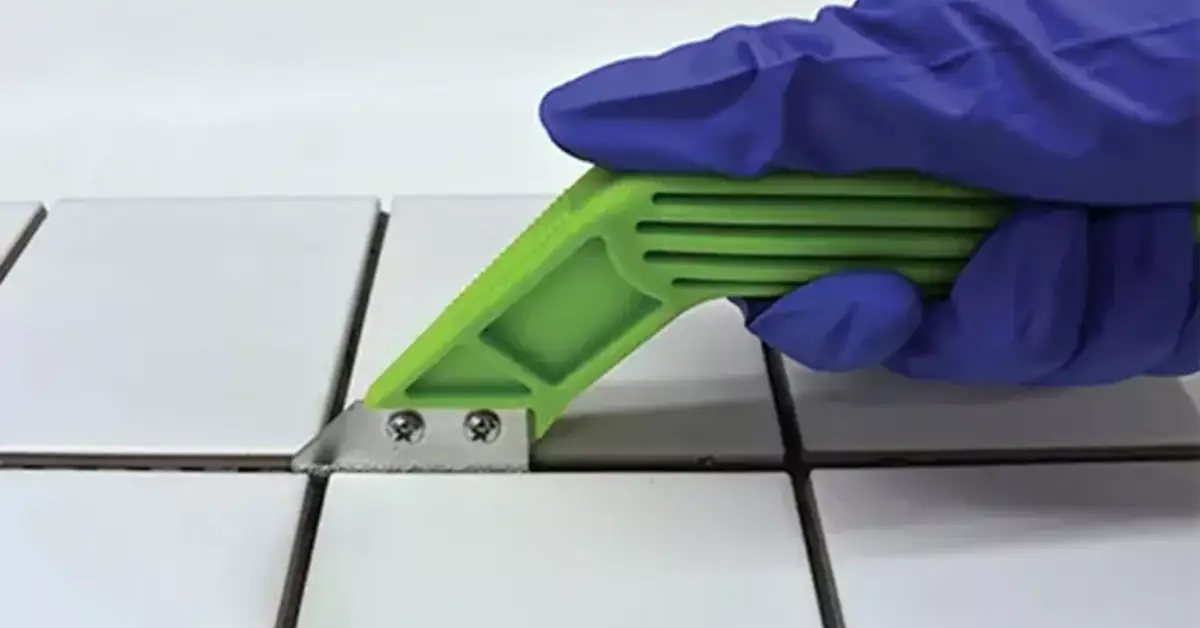
This is the classic tool most pros reach for when they want precision. A grout saw looks like a small handle with a thin, serrated blade designed to cut into the grout line without touching the tiles.
Here’s how to use it right:
- Start slow. Hold the saw at a 90-degree angle to the grout line.
- Work in short strokes. Let the blade do the cutting — don’t force it.
- Apply even pressure. Push too hard, and you risk cracking edges.
- Clear debris often. Stop every few inches to brush away dust and check your progress.
A grout rake works similarly but is ideal for softer or thinner grout lines. I prefer it for small, fragile areas like shower walls or decorative tiles.
Pro tip: For tight or decorative areas, alternate between a saw and a rake. The rake loosens the surface; the saw finishes deep cleaning.
According to Rubi Tools’ professional guide, using the correct blade size and keeping your strokes straight dramatically reduces the risk of chipping glaze or widening joints unnecessarily.
Utility Knife or Screwdriver Trick (for Emergency Fixes)
We’ve all had those moments — a small patch of cracked grout that just won’t stop catching dust or trapping water. If you don’t have a grout saw handy, you can make do with what’s in your toolbox.
Here’s how to do it safely:
- Use a dull, flat-head screwdriver or utility knife. Avoid sharp edges that can slip under tiles.
- Work at a shallow angle. Keep your wrist steady and scrape gently along the line.
- Stop at resistance. If it feels like you’re forcing it, back off immediately.
These makeshift tools are best for emergencies or touch-ups, not full removals. The goal is to loosen surface grout — not to dig deep. Once you’ve cleared the problem area, vacuum or wipe away debris and inspect the tiles for any scratches before resealing.
Manual methods might take a bit more patience, but they give you full control — something no power tool can match. And in most cases, that control is exactly what keeps your floors looking as perfect as the day they were installed.
4. Power Tool Options for Large Areas (Fast but Safe)
If you’re redoing an entire bathroom or kitchen, manual tools can feel like a workout you didn’t sign up for. That’s where power tools come in — faster, cleaner, and far more efficient when used correctly. But here’s the catch: what saves you time can also cost you a tile if you rush. The goal isn’t raw speed; it’s controlled precision.
Before picking a tool, remember one thing: power tools don’t forgive mistakes. A little too much pressure or the wrong attachment can send the bit right through your grout line and into the tile surface.
Here’s how to do it right, based on both real-world use and manufacturer recommendations.
Using a Rotary Tool with Carbide Bit (e.g., Dremel)
This is the most popular grout removal setup — small, fast, and incredibly effective. A rotary tool like a Dremel 4000 or 4300 lets you carve out old grout cleanly with minimal vibration.
How to use it safely:
- Attach a 1/16″ or 1/8″ carbide bit made specifically for grout removal.
- Keep the speed around 10,000–15,000 rpm — that’s fast enough to cut grout but gentle enough for tile.
- Guide it lightly along the joint; don’t push down.
- Stop every few inches to vacuum debris and check depth.
The main mistake people make is treating it like a saw. Think of it more like a pen — gentle, guided strokes that follow the groove.
Pros: Quick, precise, easy to handle in tight corners.
Cons: Loud, dusty, and can overheat grout if left in one spot.
Oscillating Multi-Tool — Low-Vibration Removal
If you’re working on walls, backsplashes, or tiles with fragile edges, an oscillating multi-tool is a better choice. Its blade moves side to side at a high speed, giving you control without the spin of a rotary.
Recommended use:
- Use a grout removal blade with carbide grit.
- Set speed between 12,000–18,000 oscillations per minute.
- Hold the tool flat, parallel to the tile surface, and let it glide.
Because it vibrates instead of rotates, there’s less chance of chipping. It’s quieter too, usually around 70–75 dB, compared to 90+ dB from rotary tools.
Pro tip: Keep a damp sponge handy. Wipe dust often to see your progress and avoid overheating.
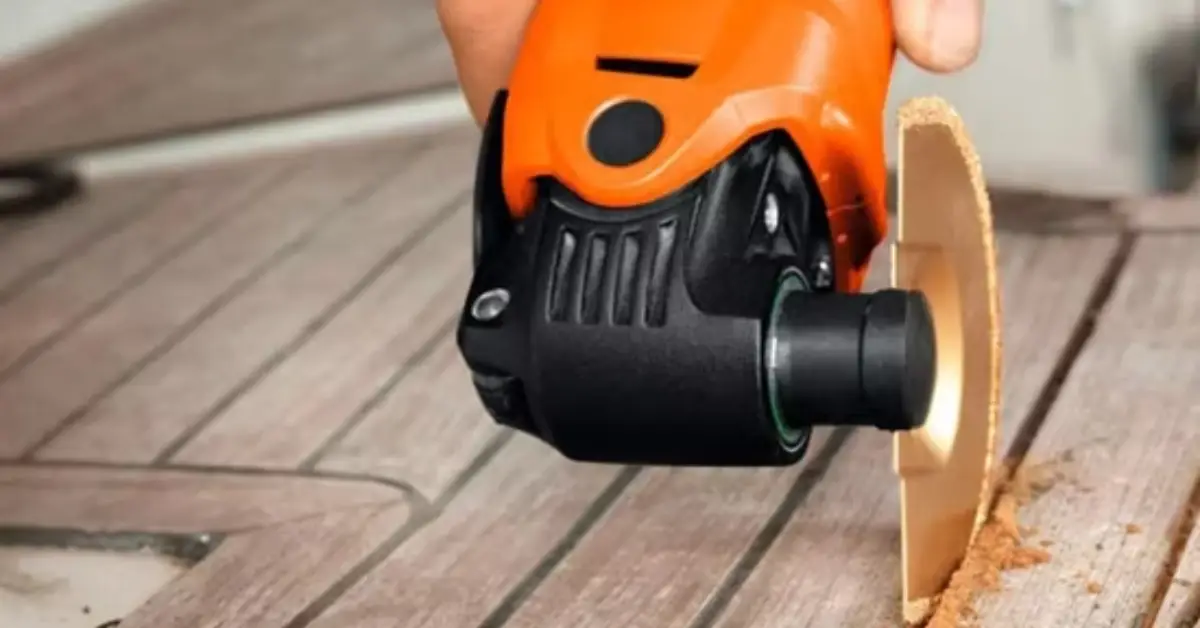
Wet Grinder for Stubborn Epoxy Grout
Epoxy grout is like concrete — durable, shiny, and extremely hard to break down. If you’ve tried hand tools and got nowhere, a wet grinder can help. It uses water to cool the surface while grinding away hardened grout.
Safe use steps:
- Fit a diamond-tipped grinding wheel.
- Use slow speed settings (around 5,000 rpm) to avoid heat buildup.
- Keep water flow steady to minimize dust.
- Move in gentle, circular motions — never stay in one spot too long.
This method takes patience but delivers clean results on industrial or epoxy floors.
Manual vs Power Tools — Quick Comparison
| Feature | Manual Tools | Power Tools |
|---|---|---|
| Speed | Slow but controlled | 5–10x faster |
| Precision | High in small areas | Moderate with practice |
| Risk of Tile Damage | Low | Medium–High if rushed |
| Dust & Noise | Minimal | High (requires mask & vacuum) |
| Best Use Case | Touch-ups, corners | Full-room removal |
Power tools can save you hours, but they demand focus. Slow down, use steady pressure, and don’t let the bit wander. Think of it as the difference between surgery and demolition — one repairs, the other replaces.
5. Chemical Softeners & Natural Alternatives
Sometimes, grout just won’t budge — even with all the right tools. That’s when chemical or natural softeners can make life easier. The key is knowing which ones to trust and when to stay away.
Commercial Grout Dissolvers
These are mild, acid-based cleaners that break down cement-based grout without harming most ceramic tiles. They’re especially useful for old or uneven grout lines.
How to use:
- Apply the dissolver directly to grout lines using a small brush.
- Let it sit for 5–10 minutes.
- Gently scrape softened grout with a plastic scraper or grout rake.
Always read labels carefully — strong acids can dull polished surfaces or discolor natural stone. Stick to pH-neutral or slightly acidic formulas designed for tile use.
According to Roff’s official grout care blog, brand-approved dissolvers are formulated to minimize damage to tiles when used in moderation.
DIY Mix: Vinegar + Baking Soda
If you prefer natural options, this one’s reliable for small jobs. Mix one part white vinegar with one part warm water, spray it on the grout, and sprinkle a little baking soda over the area. You’ll see a light fizz — that’s the reaction loosening surface dirt and softening top layers.
Scrub gently with a brush after 10–15 minutes. It won’t dissolve deep grout, but it helps in pre-cleaning before manual or power tool use.
Do not use on:
- Marble, travertine, or limestone tiles.
- Floors with sealant — acids can eat through it.
When Chemicals Are Unsafe
Certain surfaces just can’t handle acids or dissolvers. Avoid all chemical methods if your floor has:
- Sealed stone or polished marble finishes.
- Porous unglazed tiles — they absorb chemicals easily.
- Old adhesive residue beneath tiles — it may react with acids.
If you’re ever unsure, test on a hidden corner first. The safest approach is always to go mild and mechanical before going chemical.
These chemical and natural methods are your “last step” tools — use them when traditional scraping doesn’t cut it. Done right, they save time and effort while keeping your tiles as good as new.
6. Post-Removal Cleanup and Tile Resealing
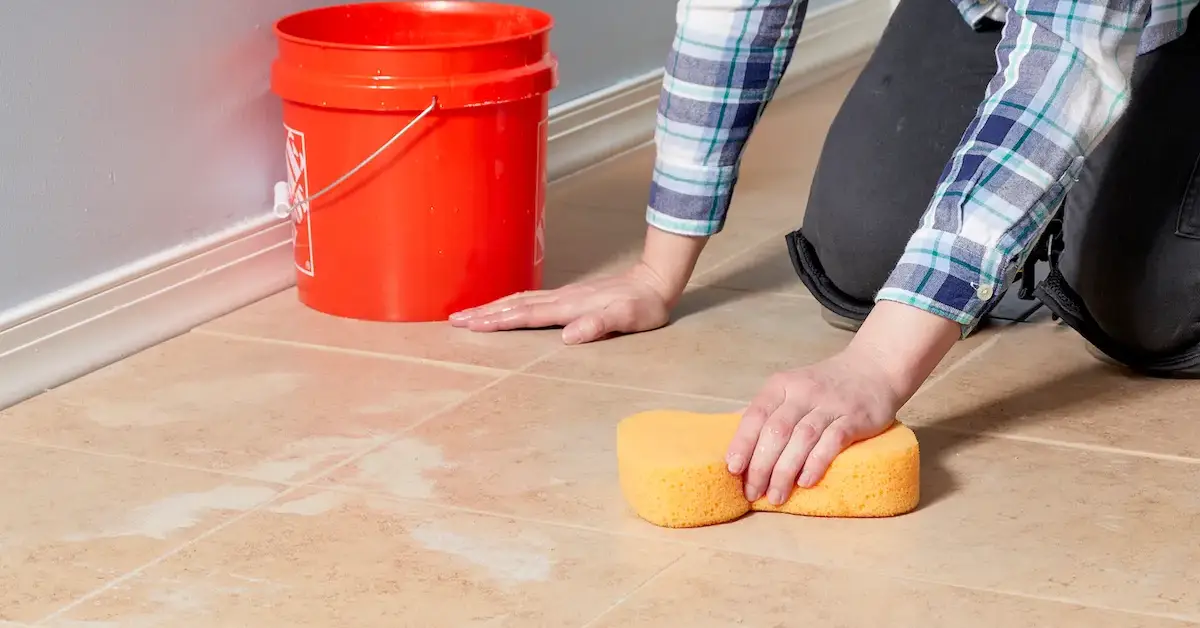
Once the last bit of grout dust settles, don’t rush to pack up your tools just yet. This stage — cleaning and resealing — is what separates a job that lasts for years from one that starts crumbling again in months. I’ve seen people stop right after scraping, only to call me later asking why their tiles turned dull or stained. The answer is simple: they skipped this step.
Start by clearing all debris. Use a vacuum cleaner with a brush attachment to suck up loose particles from every joint. Then go over the floor with a damp microfiber cloth — not a wet mop — to pick up any remaining dust. You want the surface clean, not soaked.
Next comes the waiting game. After grout removal, give your tiles at least 24 hours to dry completely before you start re-grouting. Any trapped moisture can weaken the new grout bond or cause mildew underneath.
Once re-grouted and cured (usually another 48–72 hours), apply a grout sealer. This invisible barrier is your best defense against water, stains, and mold. I prefer using a penetrating sealer applied with a small foam brush — it soaks into the grout rather than sitting on top.
Here’s a quick table to keep your cleanup routine simple:
| Do’s | Don’ts |
|---|---|
| Vacuum and wipe thoroughly before resealing | Don’t mop heavily or flood the floor |
| Wait at least 24 hours before re-grouting | Don’t grout on damp surfaces |
| Use a penetrating sealer and reapply yearly | Don’t use wax-based or glossy coatings |
| Test the sealer on a small area first | Don’t skip sealant — it prevents stains and cracks |
Think of sealing as closing a door — you’re locking out moisture and dirt. Once you’ve done it properly, your tiles will look cleaner, resist grime, and need far less scrubbing down the road.
Now that your tiles look spotless again, it might be the perfect time to refresh your space — here are 8 tacky bathroom choices that make your home feel dated and simple updates that instantly modernize your bathroom.
7. Expert Tips to Prevent Future Grout Damage
After all that effort, you’ll want to keep those clean lines looking fresh for as long as possible. The good news? With a few small habits, you can easily extend the life of your grout and tiles for years.
Here’s what I’ve learned works best:
- Clean gently, not aggressively. Use a mild cleaner or a mix of warm water and dish soap once a week. Avoid harsh acids — they eat away at both grout and sealant.
- Use a soft brush instead of metal pads. It removes surface grime without scratching tiles.
- Reapply sealer every 12 months. Most people forget this step, but sealants fade over time, especially in high-moisture areas like bathrooms and kitchens.
- Inspect joints yearly. Look for cracks, gaps, or discoloration. Catching them early saves you from full re-grouting later.
- Ventilate regularly. Good airflow prevents mold and mildew buildup in corners and shower areas.
If you still notice damp spots or discolored grout even after resealing, it’s smart to check for hidden leaks in your home — small plumbing leaks are often the real reason behind recurring moisture damage.
Your tiles will stay bright, your grout will stay sealed, and you’ll finally stop dreading bathroom cleaning day.
When to Call a Professional
There’s a point in every DIY project where you have to stop and ask yourself, “Is this still safe to do on my own?” Grout removal can seem simple at first, but once you start hearing odd noises underfoot or noticing cracks spreading across the tiles, it’s time to bring in a professional.
The biggest red flag is tile movement — that faint hollow sound when you tap a tile with your knuckle. It means the adhesive underneath has started to loosen, and forcing grout out could make the tile pop free entirely. Another sign is deep cracks running along grout lines that reach into the tile edges. Those usually mean structural stress or subfloor issues, not just surface wear.
If you’re already seeing chipped corners, uneven gaps, or discoloration beneath the tiles, you’ll save money by calling an expert before it spreads. Professionals have vacuum-equipped tools that remove grout cleanly without the dust storm, and they can reseal and level everything in one visit.
Professional grout removal and replacement averages $200–$1,000 depending on the size of the area, tile type, and accessibility. Small touch-ups may cost around $3–$10 per square foot, while complex epoxy or marble jobs run higher.
Hiring a pro isn’t giving up; it’s protecting your investment. If your tiles are older, expensive, or irreplaceable, that extra care is worth every penny.
Key Takeaways: Safe Grout Removal in a Nutshell
You’ve made it this far, so here’s a quick recap you can save before starting your project:
- Check your grout type first — cement, epoxy, or urethane determines your approach.
- Gear up properly — goggles, gloves, and a dust mask are non-negotiable.
- Manual tools for small fixes — grout saws and rakes give you control and precision.
- Power tools for large areas — rotary or oscillating tools cut faster but demand steady hands.
- Use chemicals sparingly — stick to mild dissolvers or natural mixes when needed.
- Clean and reseal — vacuum, dry, and seal to keep out moisture.
- Maintain regularly — gentle cleaning and yearly inspections keep grout strong for years.
Each of these steps keeps your tiles safe, your air cleaner, and your floors looking new long after the dust settles.
So before you grab that tool, take a breath, plan your process, and remember: the goal isn’t just removing grout — it’s protecting the beauty and life of your floor.
What’s your grout story? Have you tried any of these methods yourself? Share your experience in the comments — I’d love to hear what worked (or didn’t) for you.
And for more practical home-improvement tips, DIY guides, and flooring hacks, visit Build Like New for expert advice you can actually trust.
Disclaimer: The information in this article is for general home improvement guidance only. Always follow manufacturer instructions for tools and products, use proper safety gear, and consult a licensed contractor if you’re unsure or working with valuable or fragile tile surfaces. Build Like New is not responsible for any damage or injury resulting from DIY grout removal or related activities.