
7 Simple Tricks to Free a Painted-Shut Window Safely
I’ve wrestled with painted-shut windows more times than I can count. The fear is real: one hard pry and you crack the glass or chew up the frame. I’ve made that mistake—once. Never again.
Most advice jumps straight to “cut and pry.” That works sometimes, but it’s also how damage happens. Layers of paint, swollen wood, and hurried repaint jobs each need a gentler first move. So I pulled what actually works—from pros and real homeowners—and stripped it down to simple, safe steps.
In this guide, I’ll walk you through seven easy ways that start soft and get slightly stronger only if needed: scoring seams, easing pressure, smart lubrication, a bit of low heat, controlled leverage, and clear signs to stop. We’ll talk tools, quick safety (including older homes), and how to keep the sash from sealing shut again.
Before we dive in, tell me: where is your window stuck—bottom sash, top sash, or all around? And what have you tried so far?
Why Windows Get Painted Shut in the First Place
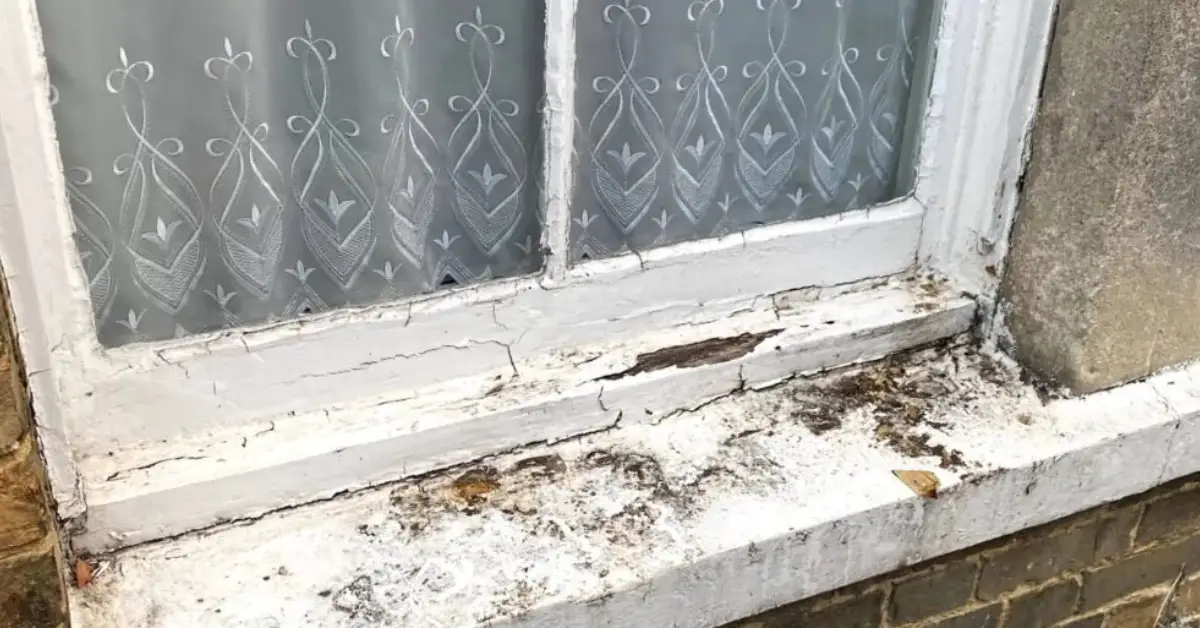
I used to think a painted-shut window just meant “bad luck” or “cheap paint.” The truth is, it’s rarely that simple. Most windows get sealed over time for three big reasons:
- Layer after layer of paint: Every time someone repaints without cutting the seam, a thin line of paint drips into the joint and dries like glue.
- Quick repaint jobs: When painters rush, they don’t always open the sash before the coat dries. One careless brush stroke can lock the frame tight.
- Moisture and humidity: Wood swells during damp seasons, and if paint dries during that swelling, the window is basically welded shut until you intervene.
Understanding these causes matters. If you know why it happened, you’ll know how to stop it happening again. That means when you finally free the sash, you’re not just solving today’s problem—you’re preventing the same headache next summer.
Safety First — Tools and Precautions You Need
Before I touch a stuck window, I always prep my tools and gear. Rushing in with brute force is how frames splinter and glass cracks. A little setup time saves expensive repairs later.
Here’s what I keep close by:
- Utility knife – for scoring the paint line cleanly.
- Putty knife – to slip between seams without gouging the wood.
- Small hammer or mallet – for tapping gently, not smashing.
- Lubricant spray – WD-40 or even silicone spray makes a world of difference.
- Gloves and safety glasses – because slipping on glass is no joke.
I like to keep this in a simple checklist:
- Gloves on
- Knife blades sharp
- Spray can ready
- Clear workspace (no clutter at your feet)
As This Old House explains in their window care guides, being patient and properly equipped is the difference between a smooth fix and a costly repair. And I’ve learned that lesson the hard way.
So before you even think about prying, pause for two minutes, grab these basics, and set yourself up right. Your future self will thank you.
Step 1 — Score the Paint Seam With a Utility Knife
The very first thing I reach for is a sharp utility knife. Forget pushing or prying for now—your job is to cut through the tiny paint bridges that are locking the sash in place.
Here’s how to do it right:
- Run the blade slowly along all seams where the sash meets the frame.
- Keep the knife angled slightly away from the glass.
- Don’t force it—let the sharp edge slice the paint rather than digging into the wood.
If you rush, you risk scratching the glass or gouging the frame. As Better Homes & Gardens notes in their repair guide, patient scoring is the safest way to begin before trying any heavier moves.
Think of it as “unzipping” the window—quietly breaking the seal so the next step actually works.
Step 2 — Use a Putty Knife to Loosen Stuck Edges
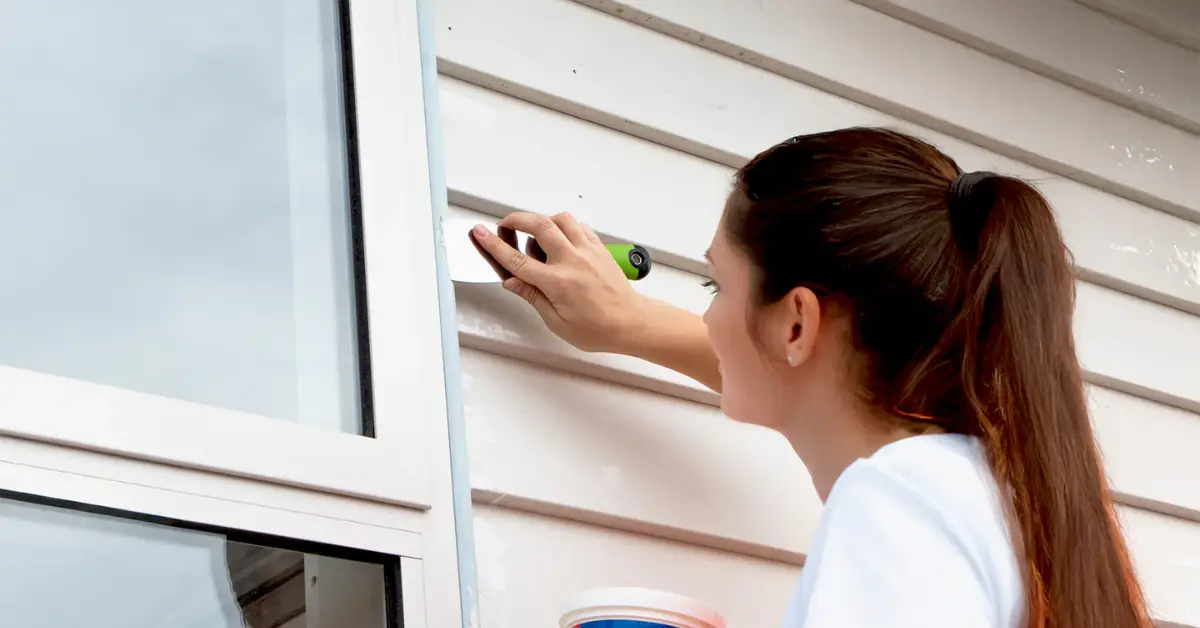
Once the seams are scored, I move to a putty knife. This tool is perfect for easing the edges without tearing up the wood.
Here’s my go-to approach:
- Start at a bottom corner and slide the blade in gently.
- Rock it side to side to break the paint bond.
- Work your way around the frame, always moving slowly.
The trick is knowing when to back off. If the wood creaks or you feel heavy resistance, don’t jam the blade deeper—you could crack the sash. Instead, move to another spot and come back once the edges have loosened.
This step is about patience, not power. Done right, you’ll start to feel the window relax as the paint bond breaks away. That little wiggle of freedom is the first sign you’re on the right track.
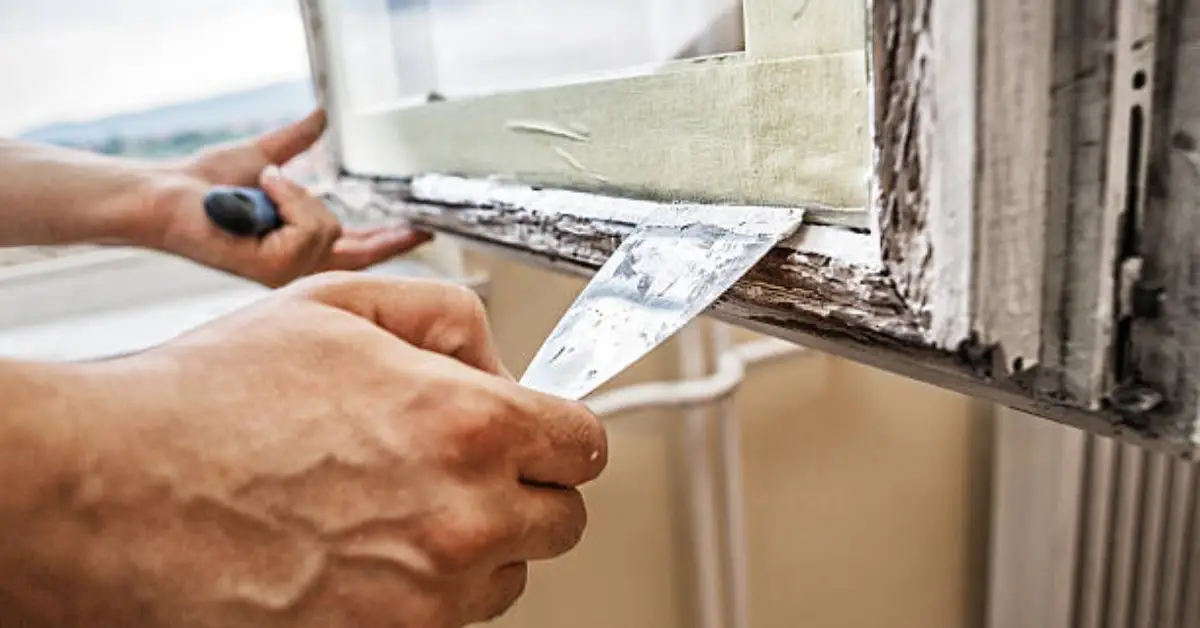
Step 3 — Apply Gentle Leverage With a Pry Bar or Hammer
Even after scoring and loosening, some windows just won’t give. That’s when I reach for a small pry bar or hammer—but the trick is using them with patience, not power.
- Slip the flat end of the pry bar against the sash.
- Tap lightly with a hammer or mallet, working your way around the frame.
- Pay attention to small cracking sounds as the paint seal starts to release.
What matters here is rhythm, not muscle. If you swing hard, you can split the wood or even crack the glass. A series of soft, steady taps weakens the bond without damage.
Step 4 — Lubricate Stubborn Joints With Household Products
When the window still resists, lubrication often does the trick. Dried paint bonds can feel like cement, but adding something slippery makes them easier to break.
Good options I’ve used:
- WD-40 for a quick pro-level fix.
- Silicone spray for smooth, lasting glide.
- Dish soap + warm water mix as a safe budget hack.
Apply it into the seams and let it soak for 5–10 minutes. This pause is where the liquid seeps into cracks and weakens the bond.
Home improvement folks online often swear by the dish soap method—it’s cheap, safe, and surprisingly effective for old paint. And once you’ve got the sash moving again, don’t forget maintenance—check out these 5 simple steps to clean your windows with dish soap for a streak-free finish.
Step 5 — Heat the Edges to Soften Paint Bond
If nothing else works, a little controlled heat can make all the difference. Old paint softens when warmed, which makes it far easier to separate from wood.
- Use a hair dryer or a heat gun on low.
- Keep it a few inches away and move slowly along the edges.
- Heat in short bursts, then test the seam with your putty knife.
As explained in WikiHow’s guide on painted-shut windows, warming the sash is a reliable way to weaken layers of stubborn paint.
Safety tip: never overdo it. Holding the heat in one place can scorch the wood or even crack glass. Gentle warming is all you need to get the paint flexible enough to let go.
This is usually the step where you finally feel the sash move. A little patience with heat often wins the battle.
Step 6 — Work the Window Open Slowly, Bit by Bit
This is the moment you’ve been building toward. The seams are cut, edges loosened, and maybe even warmed up—now it’s time to actually move the sash.
Start at the bottom sash first. Place your hands on both sides and lift gently. Don’t expect it to fly open. Instead:
- Lift an inch on one side, then switch and lift the other.
- Keep alternating sides, working in small movements.
- If it resists, pause and repeat an earlier step—forcing it can undo all your careful work.
The goal here isn’t speed, it’s control. Bit by bit, the paint will give way. And the first smooth glide after hours of resistance feels worth every ounce of patience.
Step 7 — When All Else Fails, Call a Professional
Sometimes, despite your best efforts, the window still won’t budge—or worse, you notice the wood splintering or the glass creaking. That’s your sign to stop.
DIY has its limits. If pushing further risks breaking the sash or cracking the glass, a pro is your safest bet. Window repair specialists have the right tools and the experience to free it without damage.
As cost guides from services like Angi suggest, minor window repairs can run $150–$350, while a full replacement easily crosses $500–$1,000. Spending a little now on expert help often saves you from a far more expensive replacement later. Sometimes replacement is the smarter move, especially if your old sash is beyond saving. These 5 window upgrades that slashed energy bills show how new windows can actually pay for themselves over time.
Preventing Future Painted-Over Windows
Once your window finally moves again, the smartest thing you can do is make sure it never happens twice. Prevention is easy and takes minutes:
- Use masking tape on the edges before repainting to keep paint out of the seams.
- Open and close the window once shortly after painting so it doesn’t dry shut.
- Do seasonal checks—move your windows a few times a year, especially after humid weather, to keep them free.
These small habits stop paint from gluing your sash again. And trust me—prevention feels a lot better than going through the whole unsticking battle a second time. If you’re fixing up your windows, don’t just think about paint—also consider safety. Here are 7 window safety hacks to stop burglars in their tracks that every homeowner should know.
Quick Recap — 7 No-Damage Solutions at a Glance (Checklist)
Here’s the fast, no-fuss version you can save or share for later:
- Score the seams with a sharp utility knife.
- Loosen edges gently using a putty knife.
- Tap lightly with a pry bar or hammer around the frame.
- Lubricate joints using WD-40, silicone spray, or dish soap mix.
- Apply heat with a hair dryer or low setting on a heat gun.
- Work slowly—lift from the bottom sash, alternating sides.
- Call a professional if the frame or glass shows signs of stress.
Save this checklist for your next project—or pin it for quick reference before your next repaint.
Your Next Steps
If your window is stuck right now, grab the checklist and start step by step.
If you’re about to repaint, take two minutes for prevention and you’ll avoid the problem entirely.
I’d love to hear from you: Tried one of these methods? Share your success—or your struggle—in the comments below.
And if you’re looking for more practical, real-world home fixes, check out more guides on Build Like New—where we share proven tips to keep your home working the way it should.
Disclaimer: The information in this guide is for general DIY purposes only. Always use proper safety equipment and stop if you notice damage or risk of injury. For complex or high-risk repairs, consult a qualified professional.