8 Proven Tricks to Keep Your Antique Furniture Looking Brand New for Years
I still remember the day sunlight ruined the finish on my grandmother’s oak dresser. It sat by the window for years — her favorite spot — until one summer afternoon I noticed the varnish had faded to a dull, patchy orange. That moment taught me something every antique owner eventually learns: time isn’t the only thing that ages furniture. Sunlight, humidity, and tiny unseen pests can quietly strip away the character that took decades to form.
If you’ve ever inherited a family heirloom or spent weekends hunting for vintage treasures, you know how personal these pieces feel. They’re more than furniture — they carry stories, craftsmanship, and history you can’t replace. But preserving them isn’t just about wiping off dust or polishing the surface. It’s about understanding how wood breathes, how climate affects joints and finishes, and how small habits can decide whether your antique stays strong for another century or starts falling apart next season.
In this guide, I’ll share eight proven secrets I’ve learned over years of working with restorers, collectors, and museum experts — practical steps you can take right now to protect your vintage pieces from sun, humidity, and bugs without turning your home into a museum.
So tell me — which piece in your home would you never want to see fade?
Why “Preserving Antique Furniture” Isn’t Just Cleaning
When people think about preserving antique furniture, they usually picture a soft cloth, some polish, and a bit of weekend cleaning. I used to think that way too — until I learned that cleaning is only the surface layer of real preservation. What truly keeps vintage furniture alive is understanding how its materials respond to time, air, light, and touch.
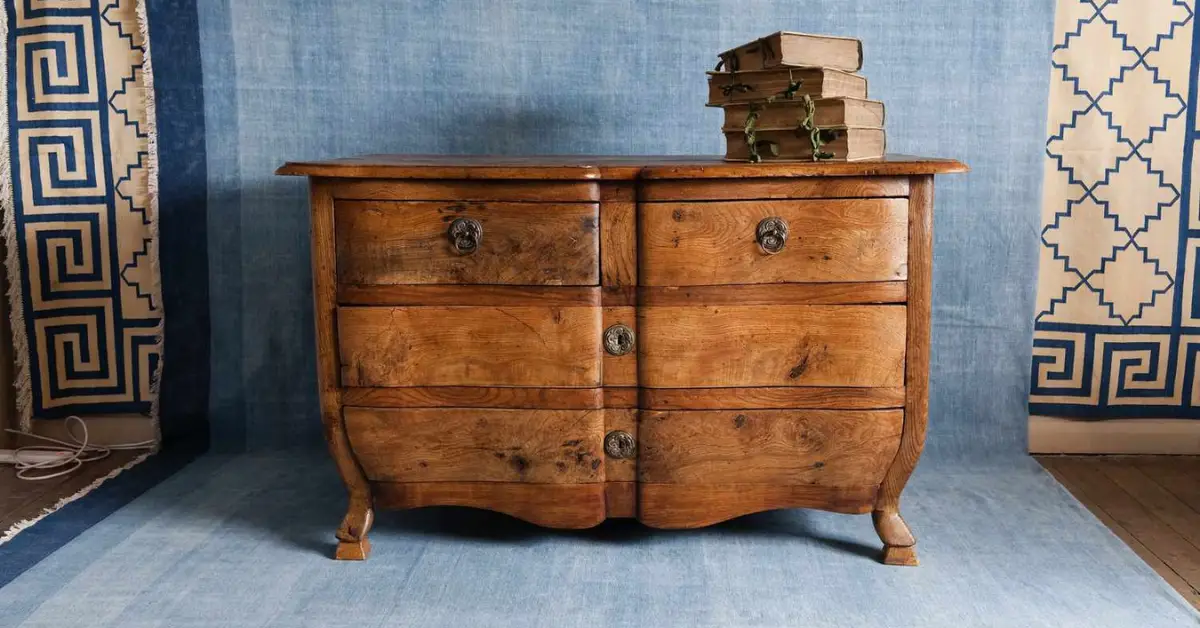
The word antique usually refers to pieces that are at least a century old, while vintage can mean anything with notable craftsmanship or style from past decades — maybe a 1950s walnut dresser or an early 1900s oak dining table. These aren’t just old objects; they’re made from natural materials that still react to their environment. Wood expands and contracts, finishes oxidize, and fabrics absorb moisture — even when they look perfectly fine on the outside.
Here’s the truth most people overlook: your furniture doesn’t age evenly. It’s constantly interacting with the room around it.
The three biggest threats are subtle but powerful:
- Sunlight and UV exposure: Constant rays don’t just fade the color — they dry out the wood and weaken finishes over time, leading to a dull or uneven look.
- Humidity and temperature swings: Rapid changes cause wood to swell and shrink, which leads to cracking, warping, or that faint creaking sound you sometimes hear. The Henry Ford Museum’s conservation team notes that maintaining a stable indoor climate is one of the most important steps in preventing this kind of structural damage.
- Pests and bugs: Tiny intruders like carpet beetles or powder-post beetles burrow through the wood, often without being noticed until the damage is deep.
If you’re reading this, chances are you’re not just worried about cleaning — you want to make sure those pieces you love actually last. You might have a family heirloom, a flea-market find, or a mid-century cabinet that carries more memory than money, but you still want to do right by it. That’s what this guide is for: learning how to protect your antiques from the slow, invisible forces that turn history into sawdust.
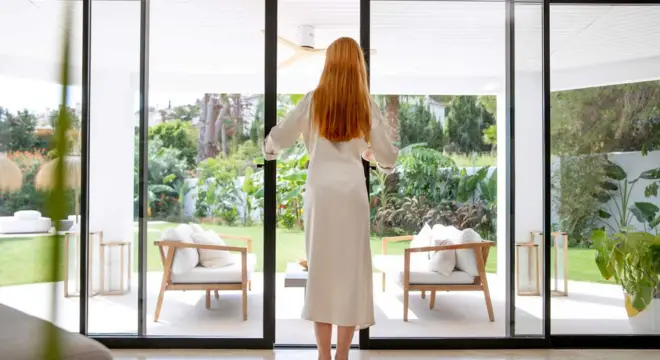
Secret #1 – Control Sunlight & Heat with Smart Placement
I’ve seen more antique finishes ruined by sunlight than by years of use. Direct sun might feel harmless, but it quietly pulls moisture out of wood, bleaches color, and softens protective finishes. The result? A once-rich mahogany table starts looking dull and uneven within a few seasons.
Spot the dangers – what direct sun does to wood, finishes, and upholstery
Sunlight isn’t just about fading colors — it dries natural oils in the wood, causing cracks and brittleness. Upholstery fabrics lose elasticity and become thin over time. If you’ve ever noticed one side of a cabinet lighter than the other, that’s UV damage in action.
Best placement practices
- Keep antique pieces away from direct windows or skylights.
- Use sheer curtains or blinds to diffuse sunlight instead of blocking it completely.
- Apply UV-protective film to windows if your furniture sits near natural light — it’s inexpensive and helps retain color.
- If possible, angle mirrors or glass doors to avoid light bouncing directly onto delicate finishes.
Heat sources to avoid
Anything that generates heat can dry and distort wood joints. Radiators, space heaters, and fireplaces create hot zones that make antique glue and finishes brittle. According to BADA – The British Antique Dealers’ Association, even a few inches too close to a heat source can cause subtle warping that’s impossible to reverse.
Quick tip: Rotate your pieces every few months — especially those near windows — so fading happens evenly.
Smart monitoring: A small light sensor or even taking monthly photos under the same lighting can help you spot gradual discoloration before it’s too late.
Secret #2 – Maintain Stable Humidity & Temperature
Wood may look solid, but it behaves like a sponge — constantly expanding and contracting based on the moisture in the air. That’s why antique furniture often creaks or shows fine cracks after a season change.
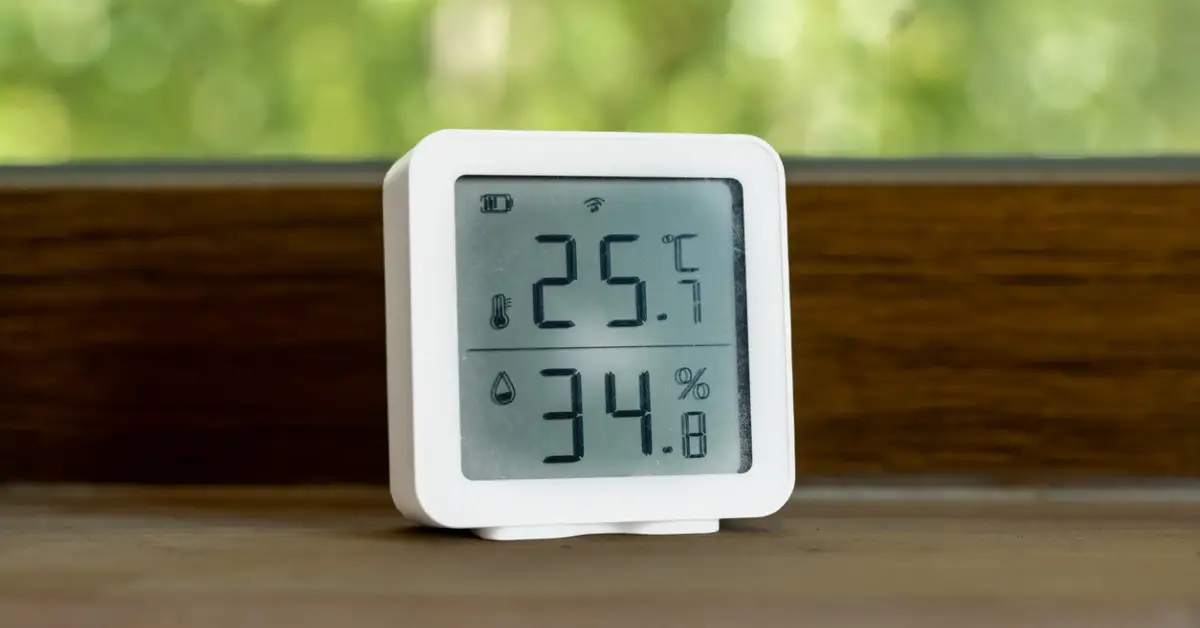
Target humidity and temperature ranges
Aim for indoor humidity between 35–45% in winter and 55–65% in summer. These ranges minimize stress on joints, veneers, and finishes. Fluctuations outside these levels are what cause warping and separation.
Why fluctuations are worse than extremes
The real danger isn’t high or low humidity — it’s constant shifting. When your AC or heater rapidly changes air moisture, the wood can’t keep up. That leads to expansion and contraction cycles that loosen glue joints and split panels.
Tools & techniques
- Use a digital hygrometer to track indoor humidity.
- Invest in a humidifier or dehumidifier depending on your local climate.
- Consider climate control settings if you store antiques in basements or attics.
- For smaller rooms, bowls of water or moisture traps can help stabilize air naturally.
Practical situations
If you live in a coastal area, high humidity is your main enemy — focus on airflow and dehumidifiers. In dry, heated homes, wood can shrink fast; keeping plants or water trays nearby helps balance the air. Basements and lofts need special care since they often swing between damp and dry.
Secret #3 – Keep Pests & Bugs at Bay Before They Start
No collector wants to hear it, but bugs love antique furniture as much as we do. Warm, dark, and wooden — it’s paradise for wood-boring insects.
Common culprits
Watch for powder-post beetles, carpet beetles, and woodworm. These pests dig deep, leaving tiny holes and tunnels that weaken the structure.
Early signs of infestation
- Tiny round holes or sawdust-like powder beneath furniture.
- Hollow-sounding wood when tapped.
- Small dark beetles crawling out during warmer months.
- Frass (fine wood dust) near corners or joints.
Preventive steps
- Inspect hidden areas like undersides, drawer joints, and the back panels.
- Keep your environment dry — pests thrive in humidity.
- Vacuum around antique pieces often to eliminate food sources like lint or crumbs.
- Avoid storing furniture directly on carpets or against walls; airflow matters.
If you’ve started noticing small holes or fine wood dust, don’t wait — these 7 proven ways to get rid of carpet beetles without calling pest control will help you tackle the problem naturally and prevent further damage to your antiques.
When professional help is needed
If you notice extensive tunneling, crumbling sections, or live insects, call a professional conservator or pest specialist. DIY sprays may mask the problem but won’t reach deep infestations.
Taking early action is the best insurance against permanent loss — once a pest colony takes hold, even restoration can’t bring back the original strength of the wood.
Secret #4 – Daily & Seasonal Care Routines

You don’t need museum gloves to keep your antique furniture in good shape — you just need a few smart habits. The secret isn’t doing more; it’s doing the right things regularly.
Dusting & cleaning: how often and what tools to use
A thin layer of dust may look harmless, but it’s abrasive. Over time, it scratches the surface, dulls finishes, and traps moisture. Dust your furniture once or twice a week using:
- A soft cotton or microfiber cloth — avoid anything rough.
- A small natural-bristle brush for carvings or hard-to-reach corners.
- No commercial sprays — they often contain silicone that clogs wood pores.
If you’re tackling a larger piece, work in sections, moving with the grain of the wood.
Polishing and wax: when and what to avoid
Polishing isn’t about making things shiny — it’s about protection. But too much of it does more harm than good.
- Use a high-quality paste wax only once or twice a year.
- Avoid aerosol polishes or those with alcohol or silicone.
- Apply sparingly with a soft cloth and let it set before buffing lightly.
Over-waxing can build up residue, trap dust, and darken wood. Less is truly more here.
Seasonal checks
Wood reacts to seasonal humidity changes. Every few months, look closely at:
- Joints and corners — are they loosening or separating?
- Veneer edges — is there any lifting or bubbling?
- Finish and color — has it dulled or lightened unevenly?
- Legs and frames — do they wobble or creak?
Spotting these changes early helps you fix minor issues before they turn into full restorations.
Quick monthly checklist for owners
- Wipe surfaces and corners.
- Check for fading or sun exposure.
- Verify humidity levels.
- Rotate decorative objects placed on top.
- Inspect for signs of bugs or frass (wood dust).
These five minutes a month can save you thousands in restoration later. And if your wooden pieces or floors already show minor scuffs, check out these 5 easy ways to remove scratches from hardwood floors without replacing them — the same gentle techniques can make antique surfaces look refreshed without harsh chemicals.
Secret #5 – Choose the Right Materials & Furnishings for Protection
Even the best-kept furniture can get damaged if what’s around it isn’t right. The pads under legs, the cover fabric, or even how you store it all play a big role in long-term preservation.
Barriers and pads
Use felt pads under legs to prevent floor scratches and reduce vibration. Always place coasters or mats under anything that touches wood — water rings are one of the easiest ways to ruin a finish. Antique Trader notes that surface barriers can prevent both heat marks and moisture damage without altering the look.
Covers and cloths
Avoid plastic covers — they trap humidity and promote mildew. Instead, use breathable cotton or linen cloths to protect from dust. According to North Carolina Historic Sites, breathable covers let air circulate while keeping the surface clean and stable.
Upholstery and fabric maintenance
Fabrics on older pieces are fragile. Rotate cushions every few months to prevent uneven wear, and keep them away from direct sunlight to prevent fading. Never store heavy items on top of upholstered seats or armrests — the compression can damage the internal structure.
Storage preparations
If you ever need to store your furniture:
- Wrap it in acid-free materials or breathable cloth, never plastic.
- Use foam corners or felt padding to protect delicate carvings.
- Keep furniture slightly elevated off the floor to prevent moisture absorption.
Secret #6 – Smart Storage & Moving of Vintage Furniture
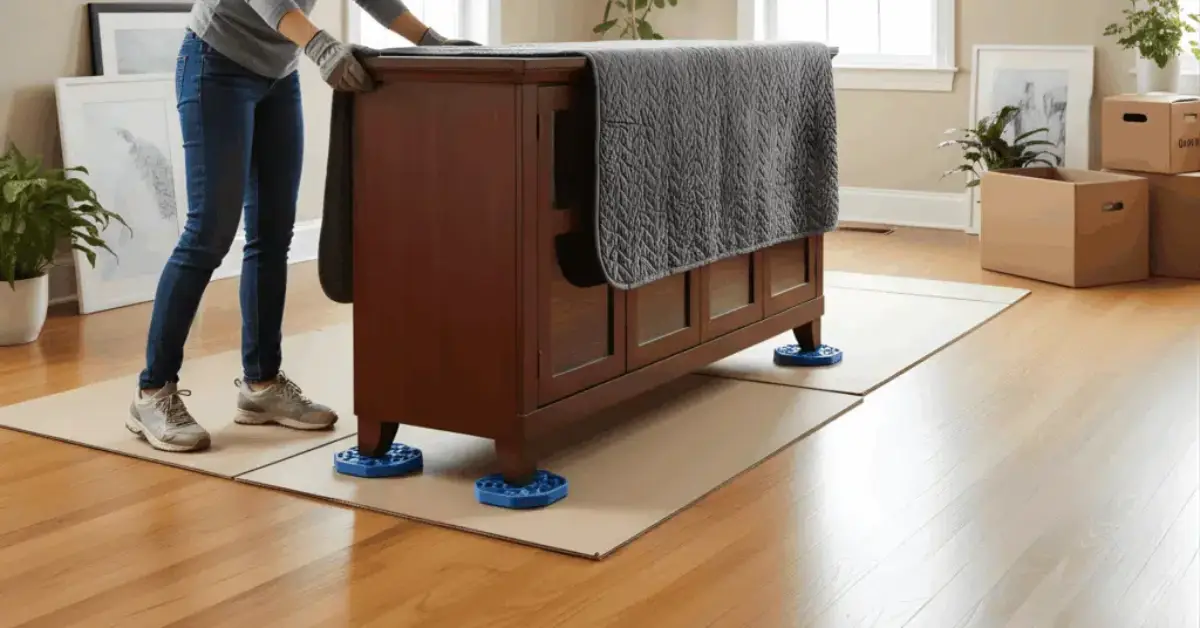
Most damage to antique furniture doesn’t happen while it’s sitting still — it happens during moving or improper storage. A single drag or sudden jolt can undo years of care.
If you must move
Always lift, don’t drag. Get help — never move large pieces alone. Remove belts, jewelry, or watches that could scratch surfaces. Tighten loose joints gently before moving. Antique Trader emphasizes supporting the furniture from its strongest points — not from fragile arms, legs, or edges.
Storage criteria
The perfect storage space should be:
- Climate-controlled — stable temperature and humidity.
- Off the floor — use pallets or risers.
- Free from dust and direct sunlight.
- Unstacked — never place heavy pieces on top of each other.
Short-term vs long-term considerations
For short-term moves (a few weeks or months), focus on protecting finishes from friction and impact. For long-term storage, monitor climate monthly and inspect pieces at least twice a year for signs of stress or insects.
Checklist for safe storage
- Photograph each piece before packing.
- Label drawers and detachable parts.
- Record condition notes (scratches, joints, color).
- Recheck humidity levels regularly.
- Keep an access path so you can inspect without shifting items.
Treat every move or storage as a temporary risk — not an afterthought. With these small precautions, your antiques will survive not just time, but transition.
Secret #7 – Repair & Restoration: When to DIY vs Call a Pro
Even the most cared-for antiques eventually need a little fixing — a loose veneer, a shaky leg, a fading finish. But here’s the thing: not every repair is safe to do yourself. The line between preserving and accidentally devaluing a piece is thinner than most people realize.
When you shouldn’t DIY
If the piece has loose veneer, cracked joints, or an original hand-rubbed finish, don’t reach for the glue just yet. These issues require precise techniques and conservation-grade materials. Amateur repairs can cause irreversible changes that reduce both beauty and market value. Original finishes, even when slightly worn, often carry historical and monetary significance — stripping or over-sanding can destroy that authenticity.
How to choose a trustworthy restorer
When it’s time to call a pro, look for experience and ethics.
Here’s what to ask before hiring:
- How long have they worked with antiques specifically?
- Do they have references or portfolio examples?
- Do they prioritize preservation over replacement?
A good restorer will explain what’s reversible, document every step, and never pressure you into unnecessary refinishing.
Minimally invasive repairs you can handle
For everyday maintenance, there are a few small tasks owners can safely do:
- Tighten loose screws gently, using a hand tool instead of power drills.
- Secure minor joints with reversible glue (like hide glue) if needed.
- Replace missing pads or drawer liners without altering structure.
Always test any product on a hidden area first — modern adhesives or polishes can stain or harden wood permanently.
Cost vs value
A proper restoration might feel expensive, but remember — you’re not just fixing furniture, you’re preserving history. A rushed repair can easily cut an item’s resale value in half. In the antique world, originality equals worth. When in doubt, invest in advice before you act.
Secret #8 – Enjoying & Using Your Vintage Pieces Without Harming Them
It’s easy to fall into the trap of treating antique furniture like fragile art. But these pieces were made to be used — just with care and understanding. You can enjoy them daily without compromising their integrity.
Using the piece responsibly
Antiques aren’t built for modern stress. Avoid leaning on chair backs, stacking heavy objects on delicate tables, or using fragile drawers for bulky storage.
Display tips
- Keep pieces away from direct sunlight or vents.
- Rotate your display occasionally to balance exposure and wear.
- Avoid harsh cleaning products or sharp décor that might scratch surfaces.
- Use soft mats or fabric liners where metal or glass touches wood.
Integrating into modern interiors
Antique furniture doesn’t have to feel “stuck in time.” Mix them with contemporary lighting, minimalist décor, or neutral walls — just avoid crowding. Giving your vintage piece breathing space not only highlights its craftsmanship but also protects it from accidental knocks or scuffs.
While arranging antiques, remember that placement affects more than just aesthetics — here’s how furniture placement can disrupt or enhance your home’s energy flow, so you can design a space that feels both balanced and timeless.
Documentation & provenance
If your piece has a story, record it. Keep a small file with:
- Photos of the piece from different angles.
- Receipts, appraisals, and repair notes.
- A short note about its history or family origin.
This documentation can help with insurance, resale, or legacy — and keeps your piece’s story alive for the next generation.
Final Thoughts & Next Steps
Preserving antique furniture isn’t about perfection — it’s about continuity. You’ve now learned the eight key secrets that experts use to protect history from sunlight, humidity, bugs, and time itself.
Quick recap:
- Control sunlight and heat.
- Maintain stable humidity.
- Keep pests out early.
- Follow daily & seasonal care.
- Choose safe materials and covers.
- Store and move with care.
- Know when to call a professional.
- Enjoy your antiques with pride — not fear.
What to do this week:
- Pick one antique you own.
- Check its placement, condition, and exposure to sunlight.
- Apply just one preservation step today — even a small adjustment matters.
If you found this guide useful, share your favorite tip or ask your own question in the comments — I personally read and reply to every one.
And if you want to keep your furniture looking and lasting like new, visit Build Like New for expert tips, printable care checklists, and hands-on restoration advice from professionals who know how to bring old treasures back to life.
Disclaimer: The information shared in this article is for educational and general guidance purposes only. Always consult a qualified restoration or conservation expert before attempting repairs on valuable or historically significant furniture. Build Like New is not responsible for any damage or loss resulting from the application of these tips without professional evaluation.