
6 Fast & Easy Ways to Clean a Shower Curtain — No Scrubbing Needed!
I’ll be honest — I used to ignore my shower curtain and liner for months at a time, thinking a quick rinse here and there was enough. But then I noticed that musty smell creeping in, and little black spots started forming along the edges. That’s when I realized: a dirty shower curtain isn’t just unsightly — it’s a breeding ground for mold, mildew, and bacteria that can affect your health and your home.
You might not see it right away, but the humid environment of your bathroom makes your curtain and liner the perfect home for soap scum, hard water deposits, and even allergens. And once those build up, cleaning becomes a chore instead of a quick fix. I’ve learned that staying ahead of it is key — a few smart habits and the right methods can save you time, stress, and a whole lot of scrubbing later.
In this guide, I’ll walk you through six proven ways to clean your shower curtain and liner — from simple hand‑washing tricks to machine methods, natural alternatives, and preventive tips that most articles skip. By the end, you’ll not only have a sparkling curtain but also a system to keep it that way without feeling overwhelmed.
Preparation – What to Check Before You Clean
Before you jump in, take a moment to get familiar with what you’re about to clean. Trust me, knowing your curtain and having the right setup makes the whole process so much easier.
Check Fabric vs. Plastic/Vinyl – What Your Material Is and Why It Matters
Not all shower curtains are the same, and using the wrong cleaning method can ruin them. Here’s the breakdown:
- Fabric curtains: Cotton, polyester, or blends. Machine-washable, but hot water or harsh detergents can shrink or fade them.
- Plastic or vinyl liners: Lightweight and waterproof, but heat can warp them, and some detergents leave a residue.
- Pro tip: Always check the care label first. If you need a reliable guide on different materials and how to wash them safely, I like referring to Martha Stewart’s tips on cleaning shower curtains and liners. It explains what works best for fabric versus vinyl in a very practical way.
Gather Your Tools & Supplies (And What to Avoid)
Having everything ready makes cleaning feel less like a chore:
- Mild detergent or baking soda for hand-cleaning
- White vinegar for mildew or soap scum
- Soft sponge or scrub brush
- Old towels (for machine washing)
- Rubber gloves
- Hooks, rings, or hangers for drying
Avoid bleach on vinyl liners unless the label allows it, and skip harsh chemical sprays — they can damage the material.
How Often You Should Clean or Replace (Frequency + Signs)
It’s easy to forget your curtain until it’s too late. Here’s a simple routine I follow:
- Machine-wash at least once a month for fabric or sturdy vinyl liners
- Spot-clean weekly to prevent soap scum and mildew buildup
- Replace when:
- Persistent black spots remain after cleaning
- Plastic liners crack, warp, or fade
- Fabric curtains smell musty even after washing
Setting a regular schedule prevents big cleaning headaches later.
Method 1 – Machine Washing (Best for Fabric & Many Liners)
If your curtain can handle the machine, this is one of the easiest and most effective ways to get it sparkling.
How to Machine-Wash Your Shower Curtain/Liner Step by Step
Remove Curtain and Rings/Hooks
Take it down carefully. Hooks can scratch your washer drum or tangle, so remove them first.
Load Settings & Detergent – What Settings to Use
- Fabric curtains: Warm water on a gentle cycle preserves color and prevents shrinkage
- Vinyl liners: Cool water on gentle cycle avoids warping
- Mild detergent is enough; skip bleach unless the care label allows
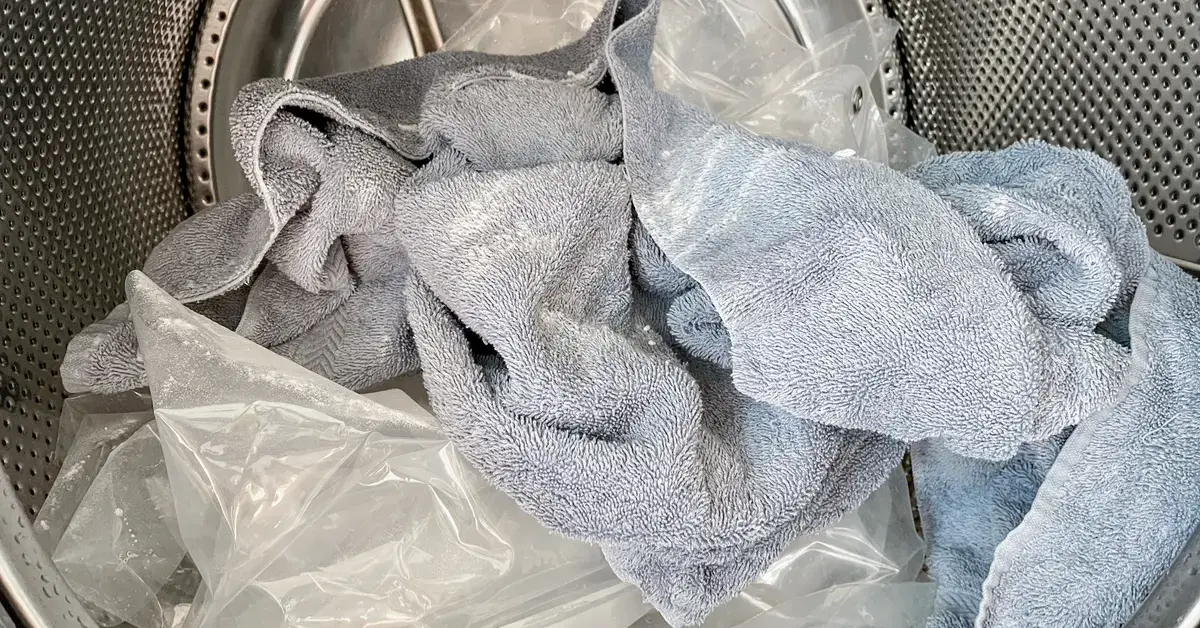
Add Towels for Extra Scrubbing Effect
Here’s a trick I use: toss in a couple of old towels. They create gentle friction and help scrub away soap scum — a small step that makes a big difference.
Drying Instructions: Air-Dry vs. Tumble
- Fabric curtains: Low tumble dry is okay, but I prefer air-drying to prevent shrinking
- Vinyl liners: Air-dry only, fully extended to prevent mildew or warping
Method 2 – Hand-Cleaning (For Vinyl/Plastic or Delicate Fabric)
Sometimes, machine washing isn’t an option — your liner might be delicate, or you just need a quick touch-up. Hand-cleaning works surprisingly well when done right.
When to Choose Hand-Cleaning vs Machine
- Hand-clean delicate vinyl or printed fabric curtains
- Machine-wash sturdier fabrics for a deeper clean
Think of hand-cleaning as targeted care — perfect for small spots or quick maintenance.
Step-by-Step Hand-Clean Method
Soaking in Tub or Large Sink
- Fill a tub or large sink with warm water and a splash of mild detergent or baking soda
- Submerge the curtain for 10–15 minutes to loosen soap scum and mildew
Spot-Treating Stains and Mildew
- Use a soft brush or sponge for problem areas
- Gently scrub black spots or stubborn soap scum — don’t overdo it to avoid damaging the material
Rinse Thoroughly & Hang to Dry
- Rinse under warm water until all detergent is gone
- Hang fully extended in a well-ventilated area to dry
- Proper airflow is key to stopping mildew from coming back
Method 3 – Natural / Low-Toxic Cleaning Options
I’ve learned that sometimes the harshest chemicals aren’t necessary. Non-toxic options can get your curtain clean, protect your health, and are better for the environment — especially if you have kids or pets running around the bathroom.
Why Consider Non-Bleach Methods
- Sensitive skin or allergies? Harsh chemicals can irritate.
- Environmentally conscious? Vinegar, baking soda, and hydrogen peroxide are biodegradable.
- Less stress on your curtain: gentle cleaning prevents wear and tear over time.
Effective Natural Agents: Vinegar, Hydrogen Peroxide, Baking Soda
Vinegar + Water Spray for Maintenance
- Mix equal parts white vinegar and water in a spray bottle.
- After every shower, give your curtain a quick spray to prevent mildew buildup.
- A simple daily habit like this can save you hours of scrubbing later.
Hydrogen Peroxide for Fabric Liners
- Use for deeper stains or stubborn mildew on fabric curtains.
- Apply with a sponge, let sit 10–15 minutes, then rinse thoroughly.
- It’s strong enough to disinfect but gentle enough for fabric.
What to Avoid
- Never mix vinegar and bleach — the chemical reaction produces toxic chlorine gas.
- Avoid abrasive brushes on delicate fabrics or vinyl.
Routine Maintenance Hacks
- Shake your curtain after every shower to prevent water pooling.
- Keep your bathroom ventilated — open a window or use a fan.
- A few minutes of preventive care keeps your curtain cleaner for longer. To keep your bathroom smelling fresh between cleans, I also follow a few simple daily habits — you can see my full routine in 7 genius ways to keep your bathroom fresh and musty-free.
Method 4 – Addressing Tough Issues: Mildew, Hard Water Stains & Lingering Odour
Even with regular cleaning, some curtains need extra attention. Here’s how I tackle the stubborn stuff:
How to Remove Mildew Safely
- Hand-scrub with a sponge and mild detergent, or use hydrogen peroxide for fabric.
- Avoid bleach on vinyl unless the label allows it — it can damage the liner.
- For detailed safety tips and step-by-step instructions, check Southern Living’s guide on stubborn mildew.
Deal with Hard-Water Mineral Build-Up and Soap Scum
- Hard water leaves chalky deposits, while soap scum leaves a filmy residue.
- Vinegar dissolves mineral deposits, and a gentle scrub removes soap scum.
- Treat the problem before it builds up — letting it sit for weeks makes cleaning much harder.
Eliminating Unpleasant Odour
- Lingering smells usually mean trapped mildew or soap residue.
- Wash or spot-clean thoroughly, then hang to dry in a well-ventilated space.
- Routine maintenance sprays (vinegar/water) help keep your curtain smelling fresh.
Method 5 – Extending Lifespan & Replacement Guidelines
Cleaning is one thing, but making your curtain last is another. A little care now saves you money and hassle later.
How to Maintain Your Curtain/Liner So It Lasts Longer
- Wipe down after showers and shake out excess water.
- Air it fully to prevent mildew from returning.
- Rotate fabric liners occasionally to prevent uneven wear.
Signs It’s Time to Replace Your Liner or Curtain
Persistent Mould That Won’t Come Out
- Even after cleaning, black spots remain — it’s time for a new liner.
Cracks, Tears, Fading, or Warped Plastic
- Plastic liners eventually warp or crack. Fabric can fade or fray.
- Replacing before it looks bad helps maintain a fresh, clean bathroom.
Eco-Friendly Disposal or Repurposing Tips
- Old vinyl liners can be recycled in some areas or cut into drop cloths for cleaning projects.
- Fabric curtains can be repurposed into rags or craft projects.
- A thoughtful approach reduces waste and keeps your cleaning routine responsible. If you want to go beyond just cleaning, check out this list of 10 bathroom items you should throw out right now — getting rid of old or worn items can make your cleaning routine much easier and prevent odors from coming back.
Method 6 – Smart Upgrades & Accessories to Make Cleaning Easier
Keeping a shower curtain clean isn’t just about scrubbing — small upgrades can prevent mess and save you a lot of time.
Upgrade to Easy‑Clean Materials or Liners with Anti‑Mildew Coatings
- Consider liners made from polyester or treated vinyl that resist mildew.
- Some fabric liners come with anti‑mildew coatings, which dramatically reduce black spots.
- I personally switched to a coated liner last year, and it made a huge difference in cleaning time. Sometimes, old or poorly chosen bathroom fixtures make even a sparkling shower curtain look dated — here are 8 tacky bathroom choices that make your home feel dated and tips to update your space.
- For a practical guide on choosing the right materials and liners, check out TumbleDry’s tips on the right way to clean shower curtains and liners. It’s really helpful if you’re thinking about upgrading.
Use Hooks with Minimal Contact Points & Detachable Rings
- Traditional rings trap water and soap scum at the top.
- I switched to hooks with minimal contact and detachable rings — they prevent buildup and make washing easier.
- This small change reduced mildew along the header line noticeably.
Ventilation & Dehumidifier Hacks for Bathroom Set‑Up
- Proper airflow is key to preventing mold and mildew.
- Open a window, run an exhaust fan during and after showers, or use a small bathroom dehumidifier.
- Think of your bathroom as a mini ecosystem — a dry environment makes your cleaning routine much easier.
DIY Quick‑Spray to Use After Each Shower
- I keep a spray bottle with equal parts vinegar and water handy.
- After each shower, I give the curtain a quick spray and squeegee off excess water.
- This daily 30‑second habit prevents buildup and reduces the need for deep cleans.
- It’s a simple step that many guides skip, but it’s been a game‑changer for me.
Summary & Action Plan
After walking through all six cleaning methods and smart upgrades, it’s time to pull everything together into a practical, actionable plan. I want you to leave with a system that’s easy to follow, not just theory.
Quick Summary Table — Material Type, Best Cleaning Method, Frequency
| Material Type | Best Cleaning Method | Frequency |
|---|---|---|
| Fabric Curtains | Machine wash, gentle cycle | Monthly |
| Vinyl / Plastic Liners | Hand-clean or machine on cool, gentle | Monthly |
| Delicate / Printed Fabric | Hand-clean with baking soda or hydrogen peroxide | As needed |
| Anti-Mildew / Treated Liners | Machine wash + quick spray maintenance | Monthly + after-showers |
| Hooks & Rings | Wipe / soak separately | Monthly |
| Rod & Wall Area | Wipe with vinegar/water mix | Monthly |
| Daily Maintenance | Vinegar spray, shake curtain, ventilate | After every shower |
This table is a quick snapshot you can glance at anytime to decide what method works for which curtain type.
30-Day Action-Plan for Readers
Here’s how I implement this in my own bathroom — simple steps that actually stick:
- Start Today: Inspect your curtain/liner and remove any visible spots. Gather all cleaning tools.
- Month One: Deep clean using your preferred method (machine or hand). Apply natural maintenance spray daily.
- Month Two–Five: Weekly spot-treating for mildew or soap scum, shake the curtain after each shower, and keep ventilation running.
- Month Six: Evaluate your liner and hooks; replace or upgrade as needed. Reassess anti-mildew liners and hooks for long-term maintenance.
Following this routine keeps your bathroom fresh and prevents buildup before it becomes a problem.
Final Pro Tip: Don’t Forget the Unseen Parts
Most people clean the curtain but forget:
- Hooks and rings — collect water, scum, and mildew
- Rod — wipe off dust or soap residue
- The liner behind the curtain — often hidden but can harbor odor
A quick wipe or rinse here prevents recurring odor and black spots, saving you from extra scrubbing later.
If you found these tips useful, drop a comment below and share your own shower curtain hacks! And for more practical home maintenance tips like this, visit Build Like New — your go-to for cleaning, repairs, and DIY upgrades that actually work.
Disclaimer: The tips and methods shared in this article are for general household cleaning purposes. Always check your shower curtain or liner’s care instructions before applying any cleaning method. Build Like New is not responsible for damage caused by improper use of cleaning products or techniques.