
10 Quick Ways to Boost Water Pressure in Your Kitchen Sink
I’ve lost count of how many times I’ve stood at the sink, turned on the tap, and felt nothing but a weak, disappointing trickle. Washing dishes takes twice as long, filling a pot feels endless, and you start wondering if the whole plumbing system is failing. If you’ve been there, I know exactly how frustrating it is.
Here’s the truth: low water pressure in your kitchen sink isn’t always a big, expensive disaster. In fact, most of the time it comes down to small, overlooked issues—things you can check and fix yourself before ever calling a plumber. I’ve seen it again and again: a clogged aerator, a valve that isn’t fully open, or a supply line that’s simply bent out of shape.
In this guide, I’m going to walk you through ten fixes that actually work. Not vague “tips” but practical steps you can try in real life. Some take five minutes, others a bit longer, but every single one has helped people like you (and me) bring water pressure back to normal without wasting money.
Have you ever tried cleaning the aerator before, or is this your first time tackling low pressure on your own?
Problem Setup & Why It Matters
I’ll be honest—low water pressure feels like one of those small annoyances you want to ignore. You stand at the sink, waiting forever for a pot to fill or scrubbing dishes under a weak trickle, and it drives you up the wall. But here’s the catch: what feels like a minor irritation can actually be an early signal of something bigger. Sometimes it’s just a clogged aerator, other times it points to leaks, hidden blockages, or even issues with your home’s plumbing system.
Think of it this way: your sink is talking to you. If you learn to pay attention, you’ll know whether it’s just being fussy—or warning you of a real problem. Clutter around the sink can also make problems feel worse than they are—check out these smart steps on how to declutter your kitchen for a cleaner, easier workspace.
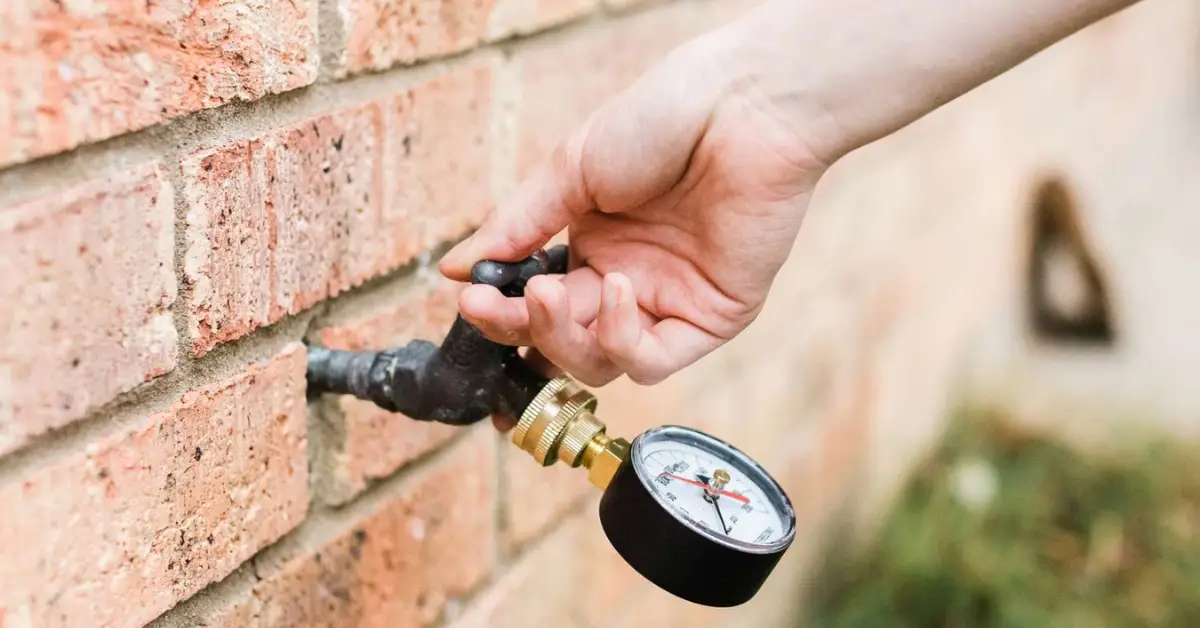
How big is the problem?
The best way to know if your pressure issue is “normal” or a real red flag is to measure it. Don’t worry—you don’t need fancy tools. Grab a bucket and a stopwatch.
- Place a standard one-gallon bucket under the tap.
- Turn the faucet on fully and start your timer.
- If it takes longer than a minute to fill, your flow rate is under 1 gallon per minute (GPM), which is considered very low.
According to Better Homes & Gardens, most kitchen faucets should flow at about 1.5–2.2 GPM, so anything far below that means you’ve got a genuine pressure issue that needs fixing.
Diagnose First: Local vs Systemic
Before you dive into fixing anything, you need to figure out where the problem really lies. Otherwise, you’ll waste time chasing the wrong cause. Here’s a quick self-check I recommend:
Is it just the kitchen or the whole house?
- Test your bathroom sink, shower, or outdoor hose.
- If the pressure drop is only at the kitchen, the problem is local—usually the faucet, valves, or lines under that sink.
- If it’s everywhere, the issue may be with your main supply, a pressure regulator, or even the city line.
Hot only, cold only, or both?
- If only the hot water is weak, your water heater or hot supply line may be the culprit.
- If only the cold water is weak, you could be dealing with a localized clog or valve issue.
- If it’s both, the faucet itself or the supply lines under the sink are your first suspects.
Recent plumbing work or maintenance?
This one gets overlooked all the time. If you—or a plumber—recently did work in your kitchen or elsewhere in the house, sediment or debris may have been knocked loose. That debris often ends up clogging aerators or cartridges. I’ve seen cases where a faucet went from perfect to useless overnight simply because of pipe work in another room.
10 Fixes: From Easy to Advanced
Here’s the order I’d follow—start small, check results, and only move to the next step if the issue isn’t solved.
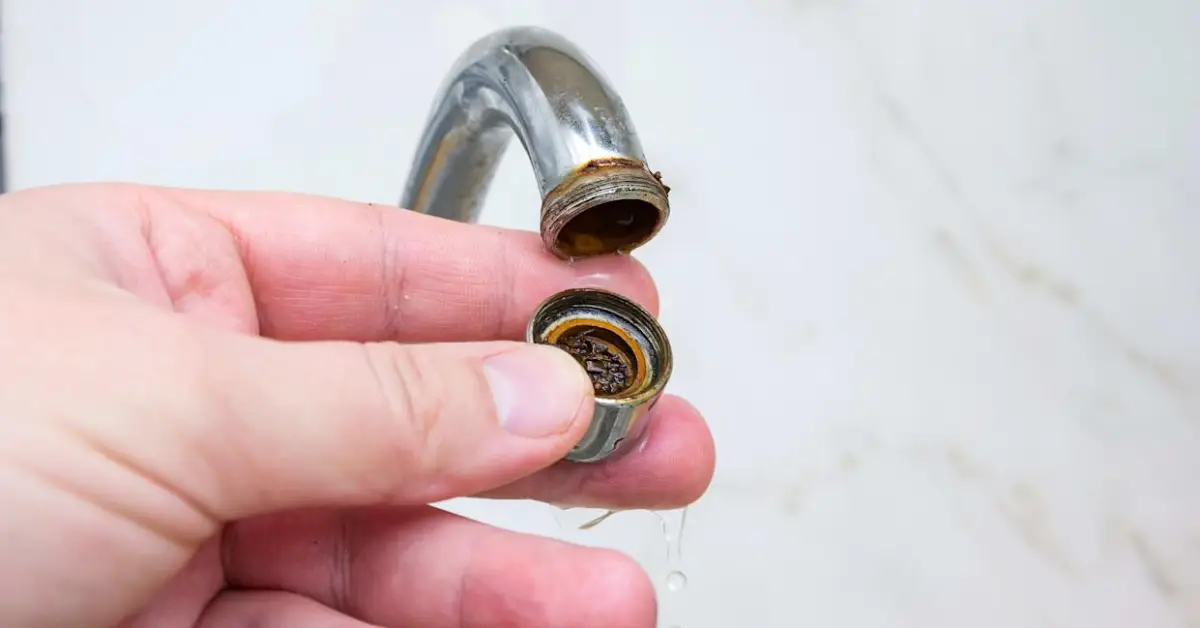
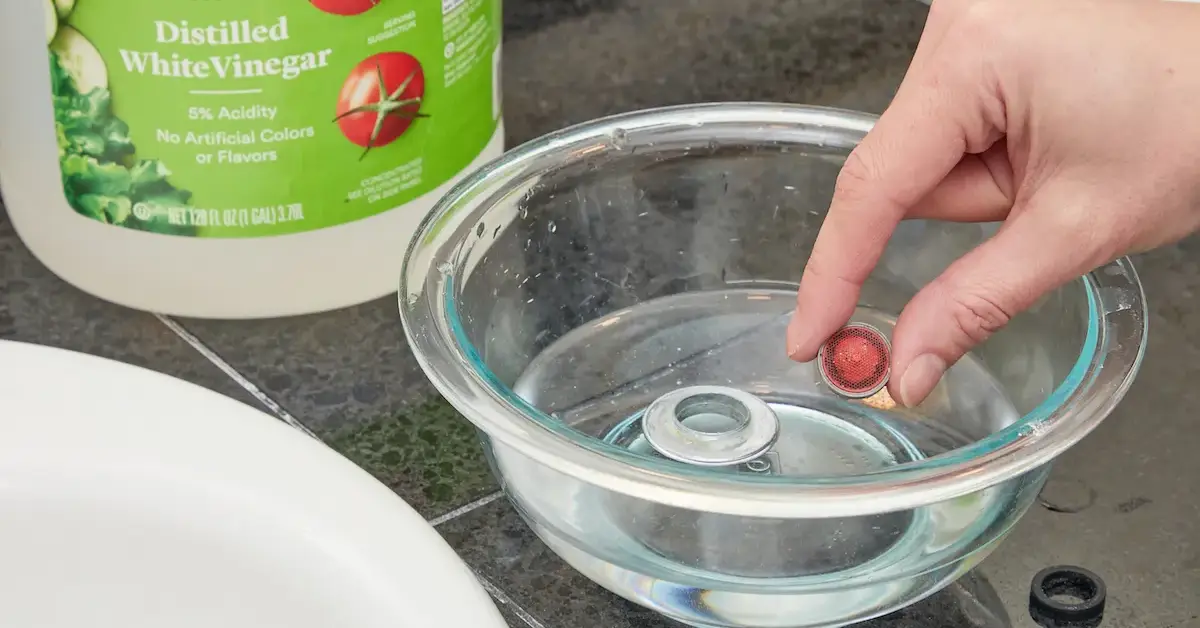
1. Clean or Replace the Aerator
- Unscrew the small screen at the end of your faucet.
- Soak it in vinegar for 20 minutes to dissolve mineral buildup.
- Scrub gently with an old toothbrush and reattach.
- Tip: If it’s stuck, wrap it in tape and use pliers so you don’t scratch the finish.
2. Flush the Faucet for Debris
- Remove the aerator completely.
- Turn the faucet on full blast for 20–30 seconds.
- This pushes out grit, sand, or tiny blockages inside the faucet.
Once your faucet’s flowing better, keeping the area spotless helps too—these genius kitchen and bathroom cleaning hacks make the job quicker and less of a chore.
3. Check Shut-Off Valves Under the Sink
- Look at the hot and cold valves attached to the wall.
- Make sure both are turned fully open.
- Twist them back and forth gently if they feel stuck or only half-open.
4. Inspect the Supply Lines
- Check the flexible braided hoses under the sink.
- If they’re bent, kinked, or crushed, straighten them out.
- Replace them with new hoses if they look worn or damaged.
5. Clean or Replace the Faucet Cartridge / Diverter
- Remove the faucet handle to access the cartridge inside.
- Soak it in vinegar to loosen mineral deposits or replace it if worn.
- For pull-out faucets, check the diverter valve that switches flow from spout to sprayer.
6. Flush the Supply Lines
- Disconnect the hoses from the faucet and place them in a bucket.
- Briefly turn the shut-off valves back on to flush out sediment or sludge.
- Reconnect the hoses and test the flow.
7. Adjust the Pressure Reducing Valve (PRV)
- Find the PRV on your home’s main water line (usually near where it enters the house).
- Use a screwdriver to turn the adjustment screw slightly while running water at the sink.
- Keep pressure below 80 psi to avoid stressing your pipes.
PV Heating, Cooling & Plumbing explains how regulators can impact the whole house.
8. Look for Leaks or Corroded Pipes
- Check under the sink, basement, or crawlspace for damp spots.
- Turn off all water in the house and see if your water meter still moves.
- If it does, you likely have a hidden leak.
9. Upgrade Old or Narrow Pipes
- Older homes with galvanized steel or undersized pipes often struggle with low flow.
- Replacing them with copper or PEX improves both pressure and water quality.
- This step usually needs a plumber, but it’s a long-term fix.
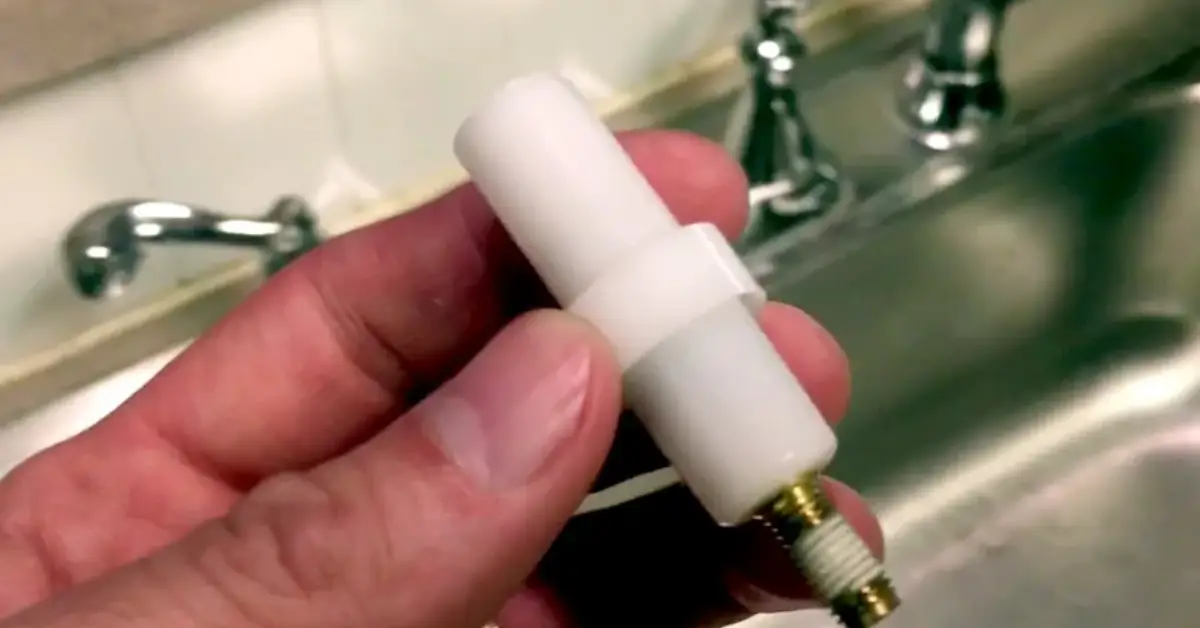
10. Install a Booster Pump
- Ideal if your home is uphill or your municipal supply is naturally weak.
- Fits under the sink or inline on the main line.
- Look for pumps with adjustable PSI so you can fine-tune the pressure.
Follow these steps in order—most people find their solution within the first few fixes, and only a small percentage ever need to go as far as replacing pipes or adding a booster pump.
Which Fix to Try First & Order of Action
Quick Triage Roadmap
Think of this as a mini flowchart you can follow before tearing your kitchen apart.
- Step 1: Start with the aerator. It’s the fastest, easiest, and most common culprit.
- Step 2: Check shut-off valves under the sink. Make sure they’re fully open.
- Step 3: Flush the faucet without the aerator to clear debris.
- Step 4: Inspect supply lines for kinks or bends.
- Step 5: Move inside the faucet—look at cartridges or diverters.
- Step 6: If none of the above work, start thinking system-wide: PRV adjustment, leaks, or pipe issues.
- Step 7: Last resort: pipe replacement or installing a booster pump.
This order saves you time and money by ruling out easy fixes first.
Time / Cost vs Complexity Trade-Off
Here’s a quick guide to help you decide which fixes are worth trying on your own:
- 5–15 minutes / $0–$10: Aerator cleaning, faucet flushing, valve check.
- 15–30 minutes / $10–$40: Supply line check or replacement.
- 30–60 minutes / $20–$60: Cartridge cleaning/replacement, diverter cleaning.
- 1–2 hours / $0–$50: Flushing supply lines under the sink.
- 1–2 hours / $20–$100: Adjusting PRV (if accessible) or checking for leaks.
- Half-day+ / $200+: Replacing pipes or adding a booster pump (usually needs a plumber).
Following this progression keeps you from jumping straight into costly or complicated fixes without first trying the quick wins.
Comparison & Edge Cases
When Only Hot Water is Weak
- Hot water issues usually point to your water heater.
- Check the heater’s shut-off valve, look for sediment buildup inside the tank, and confirm if other hot taps in the house are affected.
- If only the kitchen’s hot tap is slow, the line from the heater to that faucet may be partially clogged.
When Spray Head Works but Main Flow is Weak
- If your pull-out spray has normal pressure but the main spout feels weak, it’s almost always a diverter issue.
- The diverter is the small valve inside the faucet that directs water between the spout and sprayer.
- A clogged or stuck diverter restricts the main flow but still allows the sprayer to work.
Stack Exchange users have shared how cleaning or replacing the diverter solved this exact issue.
Municipal Supply or Pressure Issue (Beyond Your Faucet)
- If every faucet in your home has low pressure, it’s likely not your sink at all.
- Ask neighbors if they’re seeing the same problem—it could be a city-wide issue.
- Check with your water provider or board to see if work or restrictions are in place.
- A booster pump might help, but first confirm if the problem is on their end.
DIY Safety Tips & When to Call a Plumber
Safety Checklist
Before you start loosening valves or disconnecting hoses, make sure you keep things safe and tidy:
- Turn off the main water supply if you’re disconnecting lines.
- Open the faucet after shutting water off to release any trapped pressure.
- Keep a bucket and towels nearby—there’s always some leftover water in the pipes.
- Wear gloves when handling old pipes or fittings to avoid cuts from sharp edges.
- Use the right tools (adjustable wrench, pliers, screwdriver) to prevent damage.
Signs You Need a Pro
There’s a point where DIY can do more harm than good. Call a plumber if:
- You spot a pipe burst or major leak.
- The issue lies behind sealed walls or in hidden parts of your plumbing.
- You’re unsure about adjusting a PRV or replacing main pipes.
- You’ve tried the easy fixes and nothing improves.
Knowing when to stop saves you from bigger repairs later and keeps your plumbing system safe.
Maintenance Plan & Prevention
Monthly Quick Check
- Remove and rinse the aerator in vinegar to stop mineral buildup.
- Inspect shut-off valves under the sink to ensure they’re fully open.
- Do a quick flow test with a bucket—takes less than five minutes.
Annual Flush & Hose Inspection
- Once a year, flush supply lines under the sink to remove sediment.
- Replace old or cracked braided hoses with new ones to avoid sudden leaks.
- If your home has hard water, clean cartridges and faucet parts more often.
Use Filters or Scale Inhibitors
- Install a simple sediment filter on your main line to trap grit.
- Consider a scale inhibitor if you live in a hard-water area—it reduces mineral deposits that clog aerators and cartridges.
A little routine attention goes a long way in keeping pressure steady year-round. If you’re already improving your water system, it’s also a great time to rethink your everyday kitchen gear—our guide to plastic-free kitchen items for a healthier home shows simple swaps that keep your space safer and more sustainable.
Decision Guide & Next Step
Renters vs Homeowners
- Renters: Stick to easy fixes—clean aerator, check valves, replace hoses (if landlord allows). Anything beyond that, report to your landlord.
- Homeowners: You’ve got more freedom to replace cartridges, upgrade pipes, or even add a booster pump if needed.
Cost Estimate Ranges
- DIY basics: $0–$50 (aerator cleaning, valves, hoses).
- Intermediate fixes: $50–$150 (cartridge, diverter, PRV adjustment).
- Professional jobs: $200+ (pipe replacement, booster pump installation).
Choosing the Right Parts
- Supply hoses: go for braided stainless steel and match the right diameter.
- Pumps: look for models with adjustable PSI and quiet operation.
- Cartridges: match the exact brand and model of your faucet—universal ones rarely fit perfectly.
With the right plan, you’ll know what to fix yourself, what to budget for, and when to hand it off to a pro.
Your Turn: Have you ever tried fixing low water pressure yourself? Did a quick aerator clean solve it, or did you need something bigger? Share your story in the comments—I’d love to hear what worked for you.
For more practical home fixes and step-by-step guides, visit Build Like New and keep your house running smoothly without unnecessary stress.
Disclaimer: The information in this guide is for general home maintenance purposes only. Always follow safety practices, and contact a licensed plumber if you’re unsure or if the problem persists.